This section explains how to specify destinations when sending files to an FTP server.
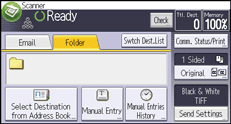
![]() Press [Manual Entry].
Press [Manual Entry].
![]() Press [FTP].
Press [FTP].
![]() Press [Enter] in [Destination].
Press [Enter] in [Destination].
![]() Press [Enter] on the right side of the server name field.
Press [Enter] on the right side of the server name field.
![]() Enter a server name.
Enter a server name.
Instead of the server name, you can also use its IPv4 address.
![]() Press [OK].
Press [OK].
![]() Press [Enter] on the right side of the path field.
Press [Enter] on the right side of the path field.
![]() Enter the path for the folder.
Enter the path for the folder.
The following is an example of a path where the folder name is "user" and the subfolder name is "lib": user\lib.
![]() Press [OK].
Press [OK].
![]() Enter the user name according to the setting at the destination.
Enter the user name according to the setting at the destination.
Press [Enter] to the right of the user name field to display the soft keyboard.
![]() Enter the password according to the setting at the destination.
Enter the password according to the setting at the destination.
Press [Password] to make the soft keyboard appear.
![]() To change the port number which is set in [System Settings], press [Change] on the right side of the port number field. Enter a port number using the number keys, press the [
To change the port number which is set in [System Settings], press [Change] on the right side of the port number field. Enter a port number using the number keys, press the [![]() ] key and then [OK].
] key and then [OK].
![]() Press [Connection Test].
Press [Connection Test].
A connection test is performed to check whether the specified folder exists.
If the message “Cannot connect with network. Check the settings.” appears, see "Troubleshooting When Using the Scanner Function", Troubleshooting.
![]() Check the connection test result, and then press [Exit].
Check the connection test result, and then press [Exit].
![]() Press [OK].
Press [OK].
![]()
The connection test may take time.
You may not be able to press [Connection Test] right after pressing [Cancel] during a connection test.
To change the registered path to a destination folder, press [Enter] to the right of the destination field to display the soft keyboard, enter the new path, and then click [OK].
The machine may fail to transfer the file if you do not have write privileges for the folder or there is not enough free hard disk space.