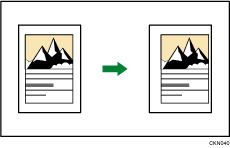
Copies an original so that a binding margin is created.

The factory default creates a 5 mm (0.2 inches) margin on the left front side and the right back side. You can change the settings under [Edit] in User Tools. For details, see Edit![]() .
.
![]() Press [Other Func.].
Press [Other Func.].

![]() Press [
Press [![]() ].
].
![]() Make sure that [Margin Adjustment] is selected. If [Margin Adjustment] is not selected, press [Margin Adjustment].
Make sure that [Margin Adjustment] is selected. If [Margin Adjustment] is not selected, press [Margin Adjustment].
![]() Press [OK].
Press [OK].
![]() Select the paper tray.
Select the paper tray.
![]() Place the originals, and then press the [Start] key.
Place the originals, and then press the [Start] key.
![]()
When making copies in Combine mode, the binding margin is added to the copies after the combination is finished.
To create the margin according to the setting specified in [1 Sided
 2 Sided Auto Margin: TtoT] or [1 Sided
  2 Sided Auto Margin: TtoB] under [Edit], enable the 1 Sided
  2 Sided function before you select [Margin Adjustment]. If you enable the 1 Sided
  2 Sided function, [Margin Adjustment] is automatically selected. If you select [Margin Adjustment] before you enable the 1 Sided
  2 Sided function, neither [1 Sided
  2 Sided Auto Margin: TtoT] nor [1 Sided
  2 Sided Auto Margin: TtoB] becomes effective.
If you select [Margin Adjustment] when [1 Sided
 2 Sided Auto Margin: TtoT] or [1 Sided
  2 Sided Auto Margin: TtoB] under [Edit] is set, the margin on the back side is created according to the copy orientation as specified in [1 Sided
  2 Sided Auto Margin: TtoT] (Top to Top) or [1 Sided
  2 Sided Auto Margin: TtoB] (Top to Bottom). However, the margin on the front side does not become effective.
