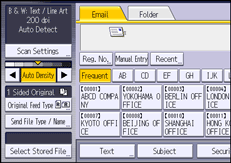
This section explains the procedure for sending multiple originals as a multi-page file or storing them as a single stored file.
![]()
 (mainly Europe and Asia)
For details about the optional units required for this function, see "Functions Requiring Optional Configurations", Getting Started.To send multiple originals as a multi-page file, in [Send File Type / Name], select a multi-page file type. For details about file types, see Specifying the File Type.
![]() Press [Original Feed Type].
Press [Original Feed Type].

![]() Select [Batch] or [SADF].
Select [Batch] or [SADF].
To scan originals using the exposure glass, select [Batch]. To scan originals using the ADF, select [SADF]. For detail about [Batch] and [SADF], see Batch, SADF.
![]() Press [OK].
Press [OK].
![]() Place originals.
Place originals.
![]() Make settings for sending or storing.
Make settings for sending or storing.
![]() Press the [Start] key to scan originals.
Press the [Start] key to scan originals.
If [Batch] is selected, place additional originals, and then press the [Start] key.
If [SADF] is selected, scanning starts automatically when you place additional originals. Place subsequent originals after the originals have been scanned.
Repeat this step until all originals are scanned.
![]() After all originals are scanned, press the [
After all originals are scanned, press the [![]() ] key.
] key.
Storing or transmission starts.
![]()
If [Batch] is selected, originals can be scanned using the ADF.
When scanning originals using the exposure glass, depending on the settings for [Wait Time for Next Orig.: Exposure Glass] under [Scanner Features], the machine can wait for additional originals even if [Batch] is not selected in [Original Feed Type]. For details about [Wait Time for Next Orig.: Exposure Glass], see Scan Settings.
If, under [Scanner Features], [Set Wait Time] is set for [Wait Time for Next Orig.: Exposure Glass] or [Wait Time for Next Original(s): SADF], place additional originals within the specified time. When the countdown ends, transmission or storage starts automatically. To start transmission or storage before the countdown is completed, press the [
 ] key. Countdown is canceled if Scan Settings or other settings are changed in the meantime. Place additional originals, and then press the [Start] key. The machine scans the originals and the countdown is resumed. For details about [Wait Time for Next Orig.: Exposure Glass] and [Wait Time for Next Original(s): SADF], see Scan Settings.
If [SADF] is selected, scanning from the exposure glass is enabled after scanning from the ADF. If this happens, you must press the [Start] key to start scanning.
