Scan to Me, an application installed on the Smart Operation Panel, allows you to send scan files to your e-mail address that is registered in the Address Book. In Scan to Me, scan data transmission starts even though an address is specified.
You can also use [![]() ] to show the on-screen instructions. The instructions navigate you through the scanning procedure so you can obtain the image you want even if you are not sure how to make settings or scan originals as you want.
] to show the on-screen instructions. The instructions navigate you through the scanning procedure so you can obtain the image you want even if you are not sure how to make settings or scan originals as you want.
Scan to Me is only available when user authentication is enabled on the machine.
For details about how to prepare e-mail transmission on the machine, see "Preparing to Use the Scanner Function", Scan.
Here is a basic procedure for sending scan files with Scan to Me.
![]() Press the [Home] key on the top left of the control panel, and press
Press the [Home] key on the top left of the control panel, and press ![]() on the right side of Home screen 3.
on the right side of Home screen 3.
![]() Press the [Scan to Me] icon.
Press the [Scan to Me] icon.
![]() Change the scan settings as necessary.
Change the scan settings as necessary.
You can also press ![]() to make scan settings.
to make scan settings.
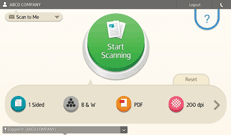
![]() Press [Start Scanning].
Press [Start Scanning].
![]() Check the preview of the scanned image.
Check the preview of the scanned image.
You can reduce or enlarge the displayed preview.
![]() Press [Send].
Press [Send].
![]()
E-mails and files are sent in the following format:
E-mail subject
"ScanToMe"
When files are divided into multiple parts, the file number and the total number of files are added to the end of the subject.
For example, when a file is divided into two parts, the subject of the first e-mail is "ScanToMe 1/2" and the second one is "ScanToMe 2/2".
Scan file name
"Transmission date and time + extension"
For example, when you send a file in PDF format at 15:30:15 on Dec. 31, 2020, the file name is 20201231153015.pdf.
To check the transmission status or history, press
 , and then press [See Scanner Journal.].