![]()
Use A4

 or 81/2 × 11
 size OHP transparencies, and specify their size.
Usually only one side of OHP transparencies can be used for printing. Be sure to load them with the print side down.
When printing onto OHP transparencies, remove printed sheets one by one.
![]() Display the initial settings screen.
Display the initial settings screen.
When using the standard operation panel
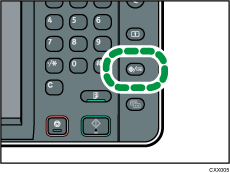
Press the [User Tools/Counter] key.

When using the Smart Operation Panel
Press the [Home] key on the top left of the control panel. Flick the screen to the left, and then press the [User Tools] icon (
 ) on the Home screen 4.
![]() Press [Tray Paper Settings].
Press [Tray Paper Settings].
![]() Press [Printer Bypass Paper Size], and then specify the paper size.
Press [Printer Bypass Paper Size], and then specify the paper size.
![]() Press [OK].
Press [OK].
![]() Press [
Press [![]() Next].
Next].
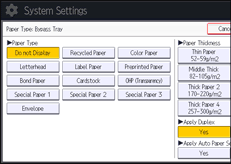
![]() Press [Paper Type: Bypass Tray].
Press [Paper Type: Bypass Tray].
![]() Select the proper items, according to the paper type you want to specify.
Select the proper items, according to the paper type you want to specify.
Press [OHP (Transparency)] on the [Paper Type] area when loading OHP transparencies.
To load thin or thick paper, press [Do not Display] on the [Paper Type] area, and then select the appropriate paper thickness in the [Paper Thickness] area.

![]() Press [OK].
Press [OK].
![]() Close the initial settings screen.
Close the initial settings screen.
When using the standard operation panel
Press the [User Tools/Counter] key.
When using the Smart Operation Panel
Press [User Tools/Counter] (
 ) on the top right of the screen.
![]()
We recommend that you use specified OHP transparencies.
For details about paper thickness, see "Tray Paper Settings", Connecting the Machine/ System Settings.
