For external authentication, the Integration Server authentication collectively authenticates users accessing the server over the network, providing a server-independent, centralized user authentication system that is safe and convenient.
To use the Integration Server authentication, software featuring Authentication Manager (e.g., Remote Communication Gate S) is required. For details about supported software, contact your sales representative.
Using Web Image Monitor, you can check the server reliability and site certificate every time you access the SSL server. For details about specifying SSL using Web Image Monitor, see Web Image Monitor Help.
![]()
During Integration Server Authentication, the data registered in the server, such as the user's e-mail address, is automatically registered in the machine. If user information on the server is changed, information registered in the machine may be overwritten when authentication is performed.
The default administrator name for ScanRouter System and Remote Communication Gate S is "Admin".
Before configuring the machine, make sure that administrator authentication is properly configured under "Administrator Authentication Management".
![]() Log in as the machine administrator from the control panel.
Log in as the machine administrator from the control panel.
![]() Press [System Settings].
Press [System Settings].
![]() Press [Administrator Tools].
Press [Administrator Tools].
![]() Press [
Press [![]() Next].
Next].
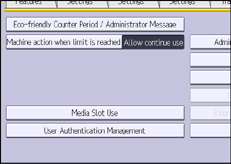
![]() Press [User Authentication Management].
Press [User Authentication Management].
![]() Select [Integration Svr. Auth.].
Select [Integration Svr. Auth.].
If you do not want to enable user authentication, select [Off].
![]() Press [Change] for "Server Name".
Press [Change] for "Server Name".
Specify the name of the server for external authentication.
![]() Enter the server name, and then press [OK].
Enter the server name, and then press [OK].
Enter the IPv4 address or host name.
![]() In "Authentication Type", select the authentication system for external authentication.
In "Authentication Type", select the authentication system for external authentication.
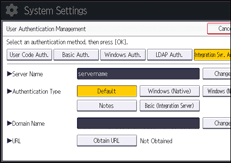
Select an available authentication system. For general usage, select [Default].
![]() Press [Change] for "Domain Name".
Press [Change] for "Domain Name".
![]() Enter the domain name, and then press [OK].
Enter the domain name, and then press [OK].
You cannot specify a domain name under an authentication system that does not support domain login.
![]() Press [Obtain URL].
Press [Obtain URL].
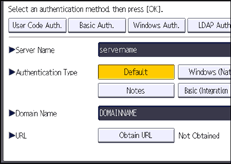
The machine obtains the URL of the server specified in "Server Name".
If either "Server Name" or SSL settings is changed after the URL is obtained, the URL is "Not Obtained".
![]() Press [Exit].
Press [Exit].
If you have not registered a group on the external authentication system being used, proceed to Step 20.
If you have registered a group, proceed to Step 14.
If you set "Authentication Type" to [Windows (Native)] or [Windows (NT Compatible)], you can use the global group.
If you set "Authentication Type" to [Notes], you can use the Notes group. If you set "Authentication Type" to [Basic (Integration Server)], you can use the groups created using the Authentication Manager.
![]() Press [Program / Change] for "Group", and then press [* Not Programmed].
Press [Program / Change] for "Group", and then press [* Not Programmed].
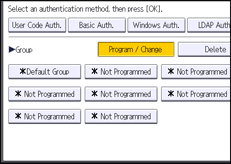
![]() Press [Change] for "Group Name", and then enter the group name.
Press [Change] for "Group Name", and then enter the group name.
![]() Press [OK].
Press [OK].
![]() In "Available Functions", select which of the machine's functions you want to permit.
In "Available Functions", select which of the machine's functions you want to permit.
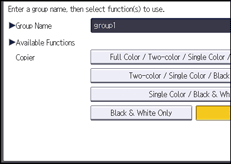
If the function you want to select is not displayed, press [![]() Next].
Next].
Authentication will be applied to the selected functions.
Users can use the selected functions only.
For details about specifying available functions for individuals or groups, see Limiting Available Functions.
![]() Press [OK].
Press [OK].
![]() Press [
Press [![]() Next].
Next].
![]() Select the "Printer Job Authentication" level.
Select the "Printer Job Authentication" level.
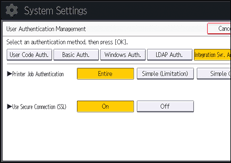
For a description of the printer job authentication levels, see Printer Job Authentication.
If you select [Entire] or [Simple (All)], proceed to Step 24.
If you select [Simple (Limitation)], proceed to Step 21.
![]() Press [Change].
Press [Change].
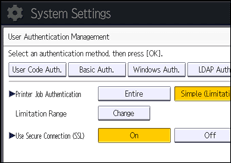
![]() Specify the range in which [Simple (Limitation)] is applied to "Printer Job Authentication".
Specify the range in which [Simple (Limitation)] is applied to "Printer Job Authentication".
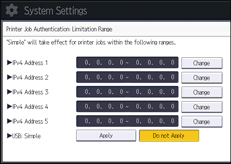
You can specify the IPv4 address range to which this setting is applied. Also, you can specify whether or not to apply the setting to the USB interface.
![]() Press [Exit].
Press [Exit].
![]() Press [On] for "Use Secure Connection (SSL)", and then press [OK].
Press [On] for "Use Secure Connection (SSL)", and then press [OK].
If you do not use secure sockets layer (SSL) for authentication, press [Off].
![]() Press [OK].
Press [OK].
![]() Log out.
Log out.
When using the standard operation panel:
Press the [Login/Logout] key. A confirmation message appears. If you press [Yes], you will be automatically logged out.
When using the Smart Operation Panel:
Press [Logout]. A confirmation message appears. If you press [OK], you will be automatically logged out.
