Before configuring the machine, make sure that administrator authentication is properly configured under "Administrator Authentication Management".
![]() Log in as the machine administrator from the control panel.
Log in as the machine administrator from the control panel.
![]() Press [System Settings].
Press [System Settings].
![]() Press [Administrator Tools].
Press [Administrator Tools].
![]() Press [
Press [![]() Next].
Next].
![]() Press [User Authentication Management].
Press [User Authentication Management].
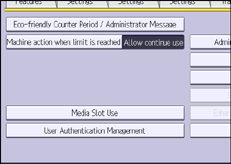
![]() Select [Windows Auth.].
Select [Windows Auth.].
If you do not want to enable user authentication, select [Off].
![]() If you want to use Kerberos authentication, press [On].
If you want to use Kerberos authentication, press [On].
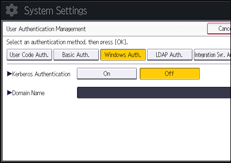
If you want to use NTLM authentication, press [Off] and proceed to Step 9.
![]() Select the Kerberos authentication realm and proceed to Step 10.
Select the Kerberos authentication realm and proceed to Step 10.
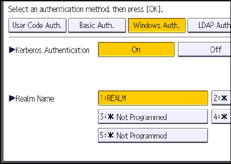
To enable Kerberos authentication, a realm must be registered beforehand. A realm name must be registered in capital letters. For details about registering a realm, see "Programming the Realm", Connecting the Machine/System Settings.
Up to 5 realms can be registered.
![]() Press [Change] for "Domain Name", enter the name of the domain controller to be authenticated, and then press [OK].
Press [Change] for "Domain Name", enter the name of the domain controller to be authenticated, and then press [OK].
![]() Press [
Press [![]() Next].
Next].
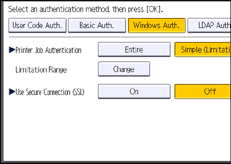
![]() Select the "Printer Job Authentication" level.
Select the "Printer Job Authentication" level.
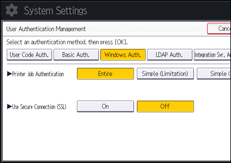
For a description of printer job authentication levels, seePrinter Job Authentication.
If you select [Entire] or [Simple (All)], proceed to Step 15.
If you select [Simple (Limitation)], proceed to Step 12.
![]() Press [Change].
Press [Change].
![]() Specify the range in which [Simple (Limitation)] is applied to "Printer Job Authentication".
Specify the range in which [Simple (Limitation)] is applied to "Printer Job Authentication".
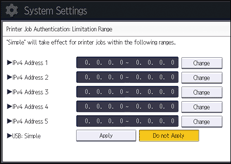
You can specify the IPv4 address range to which this setting is applied. Also, you can specify whether or not to apply the setting to the USB interface.
![]() Press [Exit].
Press [Exit].
![]() Press [On] for "Use Secure Connection (SSL)".
Press [On] for "Use Secure Connection (SSL)".
If you are not using secure sockets layer (SSL) for authentication, press [Off].
If you have not registered a global group, proceed to Step 22.
If you have registered a global group, proceed to Step 16.
If global groups have been registered under Windows server, you can limit the use of functions for each global group.
You need to create global groups in the Windows server in advance and register in each group the users to be authenticated. You also need to register in the machine the functions available to the global group members. Create global groups in the machine by entering the names of the global groups registered in the Windows Server. (Keep in mind that group names are case-sensitive.) Then, specify the machine functions available to each group.
If global groups are not specified, users can use the functions specified in [*Default Group]. If global groups are specified, users not registered in global groups can use the functions specified in [*Default Group]. By default, all functions are available to *Default Group members. Specify the limitation on available functions according to user needs.
![]() Press [
Press [![]() Next].
Next].
![]() Under "Group", press [Program / Change], and then press [* Not Programmed].
Under "Group", press [Program / Change], and then press [* Not Programmed].
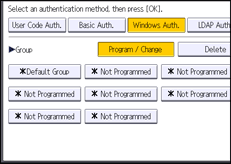
![]() Press [Change] for "Group Name", and then enter the group name.
Press [Change] for "Group Name", and then enter the group name.
![]() Press [OK].
Press [OK].
![]() In “Available Functions”, select which of the machine's functions you want to permit.
In “Available Functions”, select which of the machine's functions you want to permit.
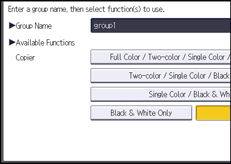
If the function you want to select is not displayed, press [![]() Next].
Next].
Windows Authentication will be applied to the selected functions.
Users can use the selected functions only.
For details about specifying available functions for individuals or groups, see Limiting Available Functions.
![]() Press [OK].
Press [OK].
![]() Press [OK].
Press [OK].
![]() Log out.
Log out.
When using the standard operation panel:
Press the [Login/Logout] key. A confirmation message appears. If you press [Yes], you will be automatically logged out.
When using the Smart Operation Panel:
Press [Logout]. A confirmation message appears. If you press [OK], you will be automatically logged out.
