When using IP-Fax transmission, specify the protocol (either SIP or H.323) and destination (IP address, host name, or alias telephone number).
When specifying the protocol for IP-Fax destinations
Selecting either SIP or H.323 or selecting methods to specify a destination depends on the network settings made by the administrator. Ask the machine administrator for details about the network settings. For details about entering an IP-Fax destination, see Types of IP-Fax destinations.
To display [SIP] and [H.323] on the screen, first configure the settings in [Initial Settings] in the Facsimile Features menu. If you use SIP, specify [Enable SIP] and [SIP Settings]. If you use H.323, specify [Enable H.323] and [H.323 Settings]. For details about these settings, see Initial Settings.
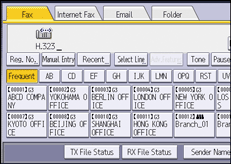
![]() Make sure that [Fax] is selected.
Make sure that [Fax] is selected.
![]() Press [Select Line].
Press [Select Line].
![]() Select [H.323] or [SIP], and then press [OK].
Select [H.323] or [SIP], and then press [OK].
![]() Press [Manual Entry].
Press [Manual Entry].
![]() Enter the IP-Fax destination, and then press [OK].
Enter the IP-Fax destination, and then press [OK].
To add a destination, press [Add], and then specify the next destination.
If you use the Address Book to specify the next destination, press the destination key.
![]()
To change the specified destination, press [Edit Dest.], and then re-enter the destination.
Depending on the security settings, [Manual Entry] might not appear and you might not be able to enter the IP-Fax destination.
IP-Fax will be available only if the gateway (T.38-compliant), gatekeeper, and SIP server are compatible with this machine. For a list of certified compatible gateways, gatekeepers, and SIP servers, contact your local retail or service representative.
For details about text entry, see "Entering Text", Getting Started.
For the maximum number of digits that can be included in a destination, see Maximum Values.