Be sure not to block the sensor or load the original untidily. Doing so may cause the machine to detect the size of the original incorrectly or display a paper misfeed message. Also, be sure not to place originals or other objects on the top cover. Doing so may cause a malfunction.
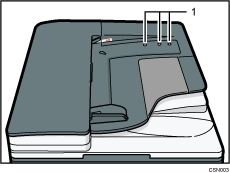
Sensors
![]() Adjust the original guide to the original size.
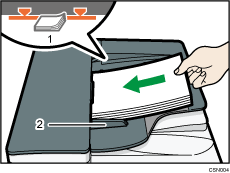
Adjust the original guide to the original size.
![]() Place the aligned originals squarely face up in the ADF.
Place the aligned originals squarely face up in the ADF.
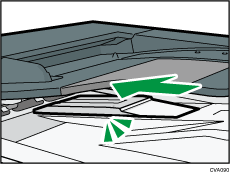
Do not stack originals beyond the limit mark.
The first page should be on the top.
Limit mark
Original guide
![]()
For information on using the ADF, see "Specifying the Settings for Originals", Copy/ Document Server.
Straighten curls in the originals before placing them in the ADF.
To prevent multiple sheets from being fed at once, fan the original before placing it in the ADF.
When inserting originals in the ADF, push them in once and without force.
After turning on the power, do not place originals in the ADF until the “Ready” message appears on the copy screen.
When using the ADF to scan originals with a paper weight that is less than 42 g/m2 (11 lb. Bond), move the slide tray on the original output tray to the left side. Not doing so may cause paper jams due to the originals becoming curled.
When the slide tray is placed on the left side, the tray capacity is decreased. After scanning the originals, return the slide tray to the original position.
Take care to place originals after any correction fluid and ink has completely dried. Not taking this precaution could cause marks on the exposure glass that will be scanned.
For details about the sizes and weights of originals that you can place in the ADF, see Recommended Original Sizes and Weights.