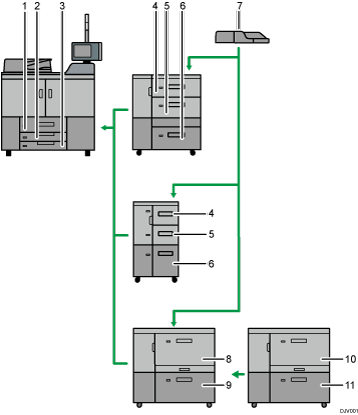
The optional units that your machine is equipped with determine the paper tray configuration.

Tray 1
Tray 2
Tray 3
Tray 4
Tray 5
Tray 6
Multi bypass tray (Tray 7)
Tray T1
Tray T2
Tray T3
Tray T4
The optional units that your machine is equipped with determine the paper tray configuration.

Tray 1
Tray 2
Tray 3
Tray 4
Tray 5
Tray 6
Multi bypass tray (Tray 7)
Tray T1
Tray T2
Tray T3
Tray T4