Each paper tray is loaded in the same way.
In the following example procedure, paper is loaded into Tray 2.
![]()
Check the paper edges are aligned at the right side.
If a paper tray is pushed vigorously when putting it back into place, the position of the tray's side fences may slip out of place.
When loading a low number of sheets, be sure not to squeeze the side fences in too tightly. If the side fences are squeezed too tightly against the paper, the edges may crease, the paper may misfeed, or if it weighs between 52.3–65.9g/m2 (14.0–17.9 lb. Bond), it may wrinkle.
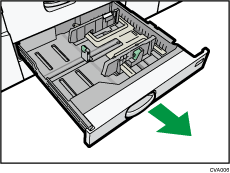
![]() Check that paper in the paper tray is not being used, and then pull the tray carefully out until it stops.
Check that paper in the paper tray is not being used, and then pull the tray carefully out until it stops.

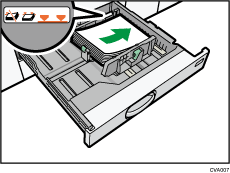
![]() Square the paper and load it print side down.
Square the paper and load it print side down.
Do not stack paper over the limit mark.

![]() Carefully push the paper tray fully in.
Carefully push the paper tray fully in.
![]()
Various sizes of paper can be loaded in Trays 2 and 3 by adjusting the positions of side fences and end fence. For details, see Changing the Paper Size in Trays 2 and 3.
You can load envelopes in Trays 2 and 3. When loading envelopes, place them in the correct orientation. For details, see Envelopes.
