If Auto Adjust Head Position has failed, perform Manual Adjust Head Position.
To check the print results of the test pattern, proceed to step 5.
![]()
Printing the test pattern consumes ink. Perform this function only when necessary.
Adjustment results vary depending on the Prevent Paper Abrasion mode's status. If you perform an adjustment while Prevent Paper Abrasion mode is enabled and do not want to print using this mode, cancel Prevent Paper Abrasion mode, and then perform the adjustment again.
Perform no other operations while the test pattern is printing.
An error will occur and test patterns will not print if:
There is a misfeed.
One of the machine's covers is open.
The machine is performing maintenance operations.
The machine has run out of ink.
The machine has run out of paper.
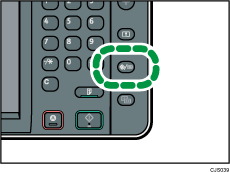
![]() Press the [User Tools/Counter] key.
Press the [User Tools/Counter] key.
![]() Press [Maintenance].
Press [Maintenance].
![]() Press [Manual Adjust Head Position].
Press [Manual Adjust Head Position].
![]() Select the items of the head position you want to adjust, and then press [Start Printing].
Select the items of the head position you want to adjust, and then press [Start Printing].
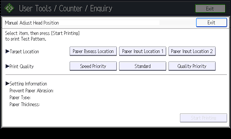
The print quality you need to select differs depending on the write mode you want to adjust the head position for.
Select [Standard] for normal printing.
Select [Speed Priority] to prioritize the adjustment time.
Select [Quality Priority] to prioritize the print quality.
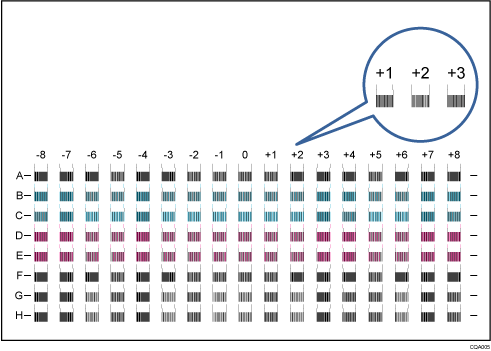
![]() Check the optimal adjustment value based on the print results of the test pattern.
Check the optimal adjustment value based on the print results of the test pattern.
The optimal adjustment value is the number above the square pattern that has the faintest color closest to gray and aligned verticals on both sides. If the value in column "A" is "+2", the adjustment value of "A" is "+2".
![]() Press [Adjustment].
Press [Adjustment].
![]() Enter the adjustment value with [
Enter the adjustment value with [![]() ] [
] [![]() ], and then press [OK].
], and then press [OK].
![]() Press [Exit].
Press [Exit].
To check the results of adjustment, print the test pattern again.
![]() Press the [User Tools/Counter] key.
Press the [User Tools/Counter] key.
![]()
For details about Prevent Paper Abrasion mode, see Checking Whether the Print-heads Scratch the Paper
 .
.