Print the test pattern to check for non-firing nozzles.
To check the print results of the test pattern, proceed to step 5.
![]()
Printing the test pattern consumes ink. Perform this function only when necessary.
Adjustment results vary depending on the Prevent Paper Abrasion mode's status. If you perform an adjustment while Prevent Paper Abrasion mode is enabled and do not want to print using this mode, cancel Prevent Paper Abrasion mode, and then perform the adjustment again.
During printing the test pattern, do not conduct any other operations.
An error will occur and test patterns will not print if:
There is a misfeed.
One of the machine's covers is open.
The machine is performing maintenance operations.
The machine has run out of ink.
The machine has run out of paper.
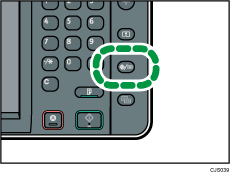
![]() Press the [User Tools/Counter] key.
Press the [User Tools/Counter] key.

![]() Press [Maintenance].
Press [Maintenance].
![]() Press [Print Nozzle Check Pattern].
Press [Print Nozzle Check Pattern].
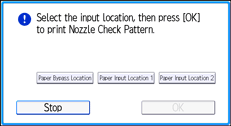
![]() Select the paper input location from which you want to print out the test pattern, and then press [OK].
Select the paper input location from which you want to print out the test pattern, and then press [OK].

![]() Check the print results of the test pattern.
Check the print results of the test pattern.
Normal print results:

If a nozzle is not firing:

The print results of the test pattern correspond to, from left to right, [Black 1], [Black 2], [Cyan], and [Magenta/Yellow] for the [Clean Print-heads] and [Flush Print-heads] functions in [Maintenance].
For example, if the print results indicate that the test pattern of Black 1 is not firing, select [Black 1] for [Clean Print-heads] or [Flush Print-heads] to reactivate the nozzle.
![]() Press [Exit].
Press [Exit].
If a nozzle is not firing, perform head cleaning.
![]() Press the [User Tools/Counter] key.
Press the [User Tools/Counter] key.
![]()
For details about Prevent Paper Abrasion mode, see Checking Whether the Print-heads Scratch the Paper
 .
.For details about head cleaning, see Clean Print-heads
 .
.
