When [Wide Scan] is selected, the machine scans using a predetermined width, regardless of the actual width of the original.
![]()
You cannot use the paper bypass location with this function.
You can copy a custom size original without specifying its horizontal and vertical sizes.
If the paper size you want to copy onto is larger than that of the original, this function shifts the image to the top center of the paper.
If the paper size you want to copy onto is smaller than that of the original, this function copies the top center part of the image.
Position of printout when [Wide Scan] is not selected. |
Position of printout when [Wide Scan] is selected. |
||
|---|---|---|---|
When an original is smaller than the paper:
|
The image is printed on the top left area of the paper.
|
The image is printed on the top center area of the paper.
|
|
When an original is larger than the paper:
|
The top left area of the original is printed.
|
The top center area of the original is printed.
|
|
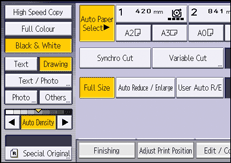
![]() Press [Special Original].
Press [Special Original].

![]() Press [Wide Scan], and then press [OK].
Press [Wide Scan], and then press [OK].
![]()
If you select [Wide Scan], the scan width is determined by the sum of the selected paper size and a specified reduce/enlarge ratio. The maximum width of Wide Scan is 914 mm (36 inches).
When originals are scanned and stored in the Document Server using this function, the stored original size is the paper size of the selected paper input location.
Depending on the paper cut method you are using, some functions cannot be used with this function. For details, see Function Compatibility
 .
.


