This section explains how to set defaults for the initial screen, which appears when the machine is turned on or when settings are cleared or reset.
The following settings can be registered as defaults:
Copier:
High Speed Copy, color mode, original type, density, Special Original, paper input location/paper bypass location, Store File (except for User Name and Password), Synchro Cut, Variable Cut, Auto Reduce / Enlarge, User Auto R/E, Finishing, Adjust Print Position, Edit / Colour, Combine, Reduce / Enlarge, number of copies
Document Server:
Initial document print screen
Auto Reduce / Enlarge, Finishing, Adjust Print Position, Stamp, Reduce / Enlarge, number of prints
Initial scan original screen
Color mode, original type, density, Special Original, paper input location, Synchro Cut, Variable Cut, Auto Reduce / Enlarge, User Auto R/E, File Info (except for User Name and Password), Edit Image, Combine, Reduce / Enlarge
Scanner:
Scan Settings, Next Original Wait, density, Original Feed Type, Send File Type / Name (except for Security Settings), Store File (except for User Name and Password), Preview, Text, Subject, Security, Recept. Notice
This section explains how to change the default functions of the initial copy screen.
![]() Specify scan settings and any other settings you require on the initial copy screen.
Specify scan settings and any other settings you require on the initial copy screen.
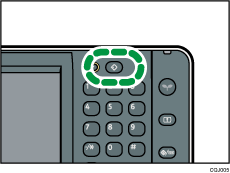
![]() Press the [Program] key.
Press the [Program] key.

![]() Press [Program as Defaults].
Press [Program as Defaults].
![]() Press [Program].
Press [Program].
![]() Press [Yes].
Press [Yes].
![]()
To restore the factory default settings on the initial screen, press [Restore Factory Defaults] in step 4, and then press [Yes].
The default settings can be programmed separately for the normal and simple screens.
