![]()
For details about the optional units required for this function, see "Functions Requiring Optional Configurations", Getting Started.
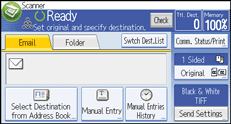
![]() Press [Send Settings].
Press [Send Settings].
![]() Press [
Press [![]() ] four times, and then press [Store File].
] four times, and then press [Store File].
![]() Select [Store to HDD + Send].
Select [Store to HDD + Send].
![]() If necessary, specify the stored file's information, such as [User Name], [File Name], and [Password].
If necessary, specify the stored file's information, such as [User Name], [File Name], and [Password].
User Name
Press [User Name], and then select a user name. To specify an unregistered user name, press [Manual Entry], and then enter the name. After specifying a user name, press [OK].
File Name
Press [File Name], enter a file name, and then press [OK].
Password
Press [Password], enter a password, and then press [OK]. Re-enter the password for confirmation, and then press [OK].
![]() Press [OK] twice.
Press [OK] twice.
![]() Specify the destination, make any other necessary settings, and then send the e-mail.
Specify the destination, make any other necessary settings, and then send the e-mail.
For details about sending a file by e-mail, see Basic Procedure for Sending Scan Files by E-mail![]() .
.
![]() Press the [Start] key.
Press the [Start] key.
![]()
Depending on the security setting, [Access Privileges] may appear instead of [User Name]. For details about specifying [Access Privileges], see .Specifying Access Privileges for Stored Files

You can resend stored files by e-mail. To resend stored files, select the files on the Select Stored File screen, and then send them. For details, see Sending a Stored File
.If a file is sent and stored simultaneously with [Security] set, the e-mail will be encrypted and the signature applied, but the stored file will be neither encrypted nor signed. For details about encrypting stored files, see "Configuring Access Permissions for Stored Files", Security Guide.