Unpacking
To protect it from shock and vibration during transit, this machine comes packaged in cushioning foam and secured with tape. Remove these protective materials after bringing the machine to where it will be installed.
![]()
|
![]()
|
![]()
|
![]()
|
![]()
|
![]()
|
![]()
|
![]()
|
![]()
|
![]()
|
![]()
|
![]()
|
![]()
|
![]()
|
![]()
|
![]()
|
![]()
Removed tape is dirty. Be careful not to let it touch your hands or clothes.
Leave the protective materials in place while moving the machine.
Lower the machine slowly and carefully to prevent trapping your hands.
Do not grip on the tray area when lifting the machine.
Do not allow paper clips, staples, or other small objects to fall inside the machine.
Keep uncovered print cartridge away from direct sunlight.
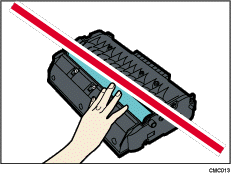
Do not touch the print cartridge's photo conductor unit.
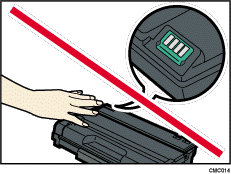
Do not touch the ID chip on the side of the print cartridge as indicated in the illustration below.
![]() Remove the plastic bag.
Remove the plastic bag.
![]() Lift the machine by using the inset grips on both sides of the machine.
Lift the machine by using the inset grips on both sides of the machine.
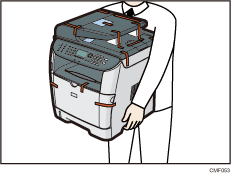
![]() Remove the protective materials attached on the machine's exterior.
Remove the protective materials attached on the machine's exterior.
Be sure to also remove the protective sheet on the control panel.
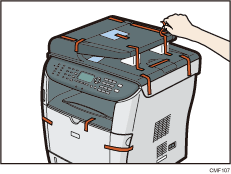
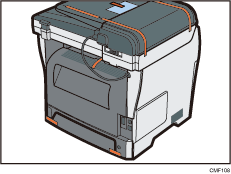
The actual machine may come with protective materials attached in different positions. Make sure to check the machine's exterior for all protective materials, and remove them completely.
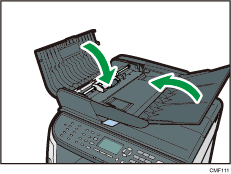
![]() Open the ADF cover.
Open the ADF cover.
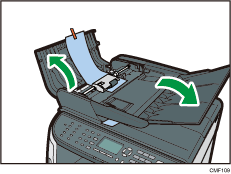
![]() Gently pull the protective sheet to remove it.
Gently pull the protective sheet to remove it.
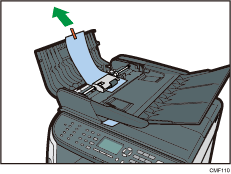
![]() Close the ADF cover.
Close the ADF cover.
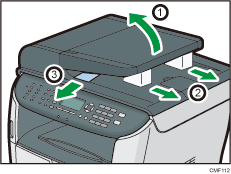
![]() Remove the protective sheet and materials.
Remove the protective sheet and materials.
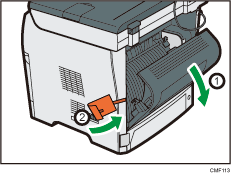
![]() Open the rear cover, and then peel off the tape on both sides of the machine.
Open the rear cover, and then peel off the tape on both sides of the machine.
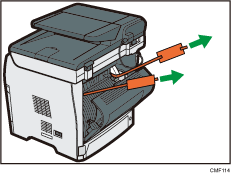
![]() Pull out the tapes and remove the protective materials. Doing so will pull up the levers on both sides.
Pull out the tapes and remove the protective materials. Doing so will pull up the levers on both sides.
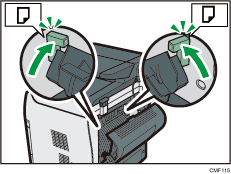
![]() Check that the levers have been pulled up to the positions indicated with
Check that the levers have been pulled up to the positions indicated with ![]() . If not, pull them up completely manually.
. If not, pull them up completely manually.
Leaving the levers lowered or not pulled up completely may affect the print quality, as toner may be insufficiently fused.
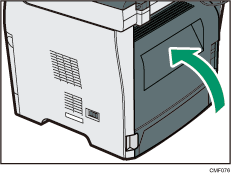
![]() Close the rear cover.
Close the rear cover.
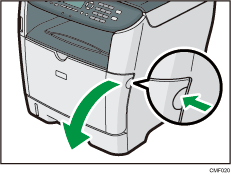
![]() Push the side button to open the front cover, and then carefully lower it.
Push the side button to open the front cover, and then carefully lower it.
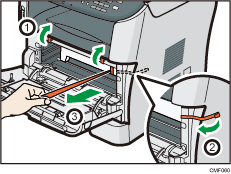
![]() Remove the protective material attached inside the machine.
Remove the protective material attached inside the machine.
![]() Unpack the print cartridge. Then, place it on a flat surface, and remove the protection sheet.
Unpack the print cartridge. Then, place it on a flat surface, and remove the protection sheet.
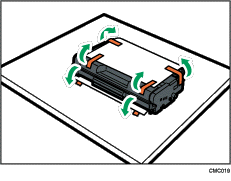
Shake the print cartridge from side to side five or six times.
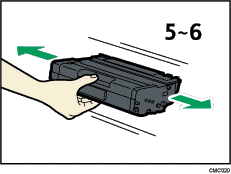
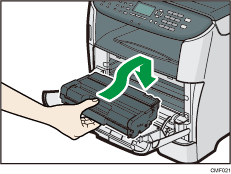
![]() Slide the print cartridge in horizontally. When the cartridge can go no further, raise it slightly and push it fully in. Then push down on the cartridge until it clicks into place.
Slide the print cartridge in horizontally. When the cartridge can go no further, raise it slightly and push it fully in. Then push down on the cartridge until it clicks into place.
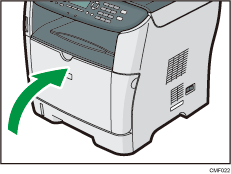
![]() Using both hands, carefully push up the front cover until it closes.
Using both hands, carefully push up the front cover until it closes.
![]() Carefully pull tray 1, and then pull out with both hands.
Carefully pull tray 1, and then pull out with both hands.
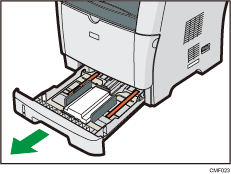
Place the tray on a flat surface.
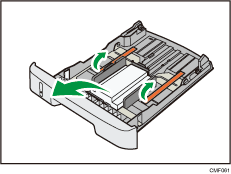
![]() Remove the protective material attached inside the tray.
Remove the protective material attached inside the tray.
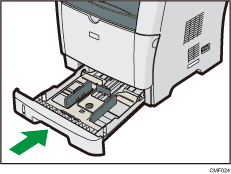
![]() Carefully push tray 1 straight into the machine.
Carefully push tray 1 straight into the machine.
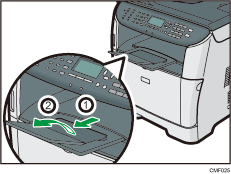
![]() Pull out and raise the stop fence.
Pull out and raise the stop fence.
