Receiving an IP Address for IPv4 Automatically (DHCP)
![]()
When you use this printer protocol in the DHCP environment with IPv4 protocol, select [DHCP] following this procedure.
When [DHCP] is selected, you cannot make settings for the following items:
IP Address
Subnet Mask
Gateway Address
Consult your network administrator for information about making network settings.
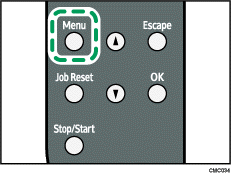
![]() Press the [Menu] key.
Press the [Menu] key.

![]() Press the [
Press the [![]() ] or [
] or [![]() ] key to display [Host Interface], and then press the [OK] key.
] key to display [Host Interface], and then press the [OK] key.
| Menu: Host Interface |
![]() Press the [
Press the [![]() ] or [
] or [![]() ] key to display [Network Setting], and then press the [OK] key.
] key to display [Network Setting], and then press the [OK] key.
| Host Interface: Network Setting |
![]() Press the [
Press the [![]() ] or [
] or [![]() ] key to display [IPv4 Config.], and then press the [OK] key.
] key to display [IPv4 Config.], and then press the [OK] key.
| Network Setting: IPv4 Config. |
When [IPv4 Config.] setting is changed, Alert indicator lights up indicating that the machine needs to be restarted. Although the printer can be used normally, the light will not turn off until you restart the machine.
![]() Press the [
Press the [![]() ] or [
] or [![]() ] key to display [DHCP], and then press the [OK] key.
] key to display [DHCP], and then press the [OK] key.
| IPv4 Config.: DHCP |
![]() Press the [
Press the [![]() ] or [
] or [![]() ] key to select [Active], and then press the [OK] key.
] key to select [Active], and then press the [OK] key.
| DHCP: Active |
The address will be detected by the printer.
![]() Press the [Menu] key.
Press the [Menu] key.
![]() If you are requested to restart the printer, turn off the printer, and then turn it back on.
If you are requested to restart the printer, turn off the printer, and then turn it back on.
![]() Print a configuration page to confirm the settings made.
Print a configuration page to confirm the settings made.
![]()
For details about printing the configuration page using control panel, see Test Printing
 .
.

