This section explains how to enter a SEP Code to request the destination to transmit a document.
You can receive a document stored in the destination's memory if the document has the same SEP Code as the SEP Code you entered.
You can enter numbers, ![]() ,
, ![]() , and spaces.
, and spaces.
Documents can be received from facsimiles that have Information Boxes.
This function enables the machine to receive documents from multiple destinations.
A SEP Code cannot be used with Internet Fax and e-mail.
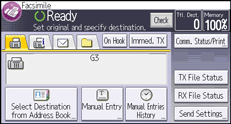
![]() Press [Send Settings].
Press [Send Settings].
![]() Press [
Press [![]() ] three times, and then press [Option Setting].
] three times, and then press [Option Setting].
![]() Press [SEP Code Reception].
Press [SEP Code Reception].
![]() Press [OK] twice.
Press [OK] twice.
![]() Specify a fax destination or IP-Fax destination.
Specify a fax destination or IP-Fax destination.
To specify a fax destination, enter the fax number using the number keys.
To specify an IP-Fax destination, press [Manual Entry], select a protocol, and enter the IP-Fax destination.
![]() Press [Advn. Features].
Press [Advn. Features].
![]() Make sure that [SEP Code] is selected.
Make sure that [SEP Code] is selected.
![]() Press [Reception SEP Code].
Press [Reception SEP Code].
![]() Enter a SEP Code using the number keys, and then press [OK].
Enter a SEP Code using the number keys, and then press [OK].
![]() When a password is required, press [Password (PWD)], enter the password using the number keys, and then press [OK].
When a password is required, press [Password (PWD)], enter the password using the number keys, and then press [OK].
![]() Press [OK] twice.
Press [OK] twice.
![]() Press the [Start] key.
Press the [Start] key.
![]()
Make sure the number of digits in the SEP Code matches the specification of the machine from which you are receiving. For the maximum number of digits for the SEP Code of this machine, see Maximum Values
 .
.To change the SEP Code that you specified, press [Edit], press [Advn. Features], and then re-enter the SEP Code.
When a SEP Code is stored in the Address Book, the SEP Code can be modified or deleted after selecting a destination on the Address Book screen. To modify or delete the SEP Code, press [Advn. Features], and then re-enter or delete it.