Make editing settings.
[Erase Border]
Deletes the borders of the scanned original according to the specified width.
If you select [Same Width], you can specify a uniform width for deletion all around the original (top, bottom, left, and right sides). If you select [Different Width], you can specify a different width for deletion for each side.
[Reduce / Enlarge]
When scanning a bundle of mixed size originals, you can unify the size of the scanned data by using [Specify Size].
Entering Values in the Reduce / Enlarge Configuration Screen
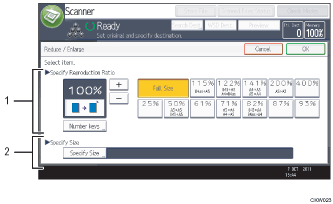
Specify Reproduction Ratio
Enter a value for the reproduction ratio.
To make a small adjustment to the reproduction ratio value, press [+] or [-].
To make a large change to the value, enter the desired value using the [Number keys], and then press [
 ].
].To use a pre-defined reproduction ratio, press the desired ratio.
Specify Size
Specify the finished size of the scanned originals.
Press [Specify Size], and then specify the finished size of the scanned originals.
To select [Custom Size] for the finished size of the scanned originals, enter the value of [Short Edge] and [Long Edge] of the scan size using the number keys.
![]()
[High Compression PDF] cannot be selected if the [Reduce / Enlarge] function is used.
For details about how to edit the pre-defined reproduction ratio, see General Settings
 .
.