![]() Press [Weekly Settings].
Press [Weekly Settings].
![]() Select the day of the week that you want to register.
Select the day of the week that you want to register.
![]() Press [Change] at the right of the item you want to specify.
Press [Change] at the right of the item you want to specify.
![]() Press [Switch Time].
Press [Switch Time].
![]() Enter the switch time, and then press [
Enter the switch time, and then press [![]() ].
].
![]() (mainly Europe and Asia)
(mainly Europe and Asia)
Enter the switch time using the number keys.
![]() (mainly North America)
(mainly North America)
Enter the switch time using the number keys, and then select [AM] or [PM].
![]() Press [OK].
Press [OK].
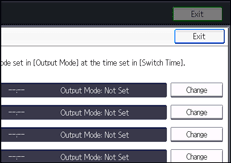
![]() Press [Output Mode].
Press [Output Mode].
![]() Select [Print], [Standby to Print], [ID Required Print], [Forwarding], or [Store].
Select [Print], [Standby to Print], [ID Required Print], [Forwarding], or [Store].
![]() If you select [Forwarding], configure the settings in "Forwarding Destination".
If you select [Forwarding], configure the settings in "Forwarding Destination".
Press [Forwarding Destination].
Specify Destination
Press [Specify Destination], specify an end receiver using the destination list, and then press [OK].
Security
Press [Security].
To encrypt e-mails, press [Encryption].
To attach a signature to an e-mail, press [Signature].
After configuring the settings, press [OK].
Print Forwarding Mark
To print a Forwarding Mark on the forwarded document, press [Print Forwarding Mark] to highlight it.
Press [OK].
![]() If you select [Store], specify the destination for the Reception Report e-mail in "Store: Notify Destination".
If you select [Store], specify the destination for the Reception Report e-mail in "Store: Notify Destination".
Press [Store: Notify Destination], and then press [Notify].
Notify Destination
Press [Notify Destination], select an e-mail address from the destinations registered in the Address Book, and then press [OK].
Security
Press [Security].
To encrypt e-mails, press [Encryption].
To attach a signature to an e-mail, press [Signature].
After configuring the settings, press [OK].
Press [OK].
![]() Press [OK] twice.
Press [OK] twice.
![]() Press [Exit] twice.
Press [Exit] twice.