Unpacking
To protect it from shock and vibration during transit, this printer comes packaged in cushioning foam and secured with tape. Remove these protective materials after bringing the machine to where it will be installed.
![]()
|
![]()
|
![]()
|
![]()
|
![]()
|
![]()
|
![]()
|
![]()
|
![]()
|
![]()
|
![]()
|
![]()
|
![]()
|
![]()
|
![]()
|
![]()
Removed tape is dirty. Be careful not to let it touch your hands or clothes.
Leave the tape holding the paper feed tray and cover in place while moving the printer.
Lower the printer slowly and carefully to prevent trapping your hands.
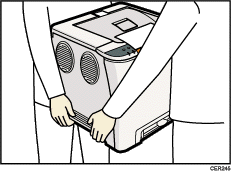
Do not grip on the tray area when lifting the printer.
Do not allow paper clips, staples, or other small metallic objects to fall inside the machine.
Keep the uncovered print cartridge away from direct sunlight.
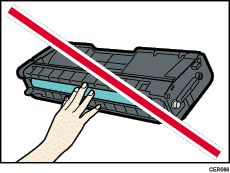
Do not touch the print cartridge's photo conductor.
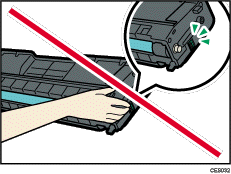
Do not touch the ID chip on the side of the print cartridge.
![]() Remove the plastic bag.
Remove the plastic bag.
![]() Lift the printer with two people by using the inset grips on both sides of the printer.
Lift the printer with two people by using the inset grips on both sides of the printer.
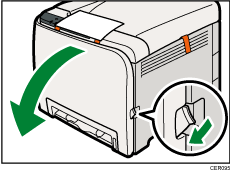
![]() Pull the opening lever on the front cover, and then carefully lower the front cover.
Pull the opening lever on the front cover, and then carefully lower the front cover.
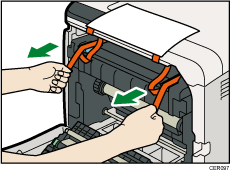
![]() Pull both tapes gently upward to remove them from the printer at the same time.
Pull both tapes gently upward to remove them from the printer at the same time.
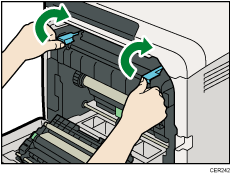
![]() Pull up the fusing unit levers with thumb fingers.
Pull up the fusing unit levers with thumb fingers.
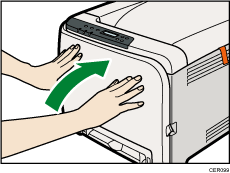
![]() Close the front cover with both hands carefully.
Close the front cover with both hands carefully.
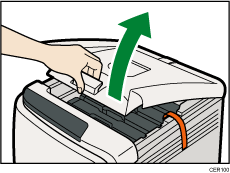
![]() Pull up top cover open lever to open the top cover.
Pull up top cover open lever to open the top cover.
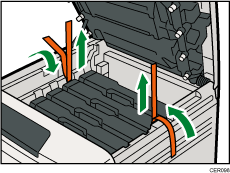
![]() Remove the protection tape.
Remove the protection tape.
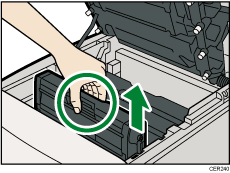
![]() Lift out print cartridges and shake them from side to side. The black print cartridge comes with a protection sheet that you must remove before shaking.
Lift out print cartridges and shake them from side to side. The black print cartridge comes with a protection sheet that you must remove before shaking.
Carefully lift out the print cartridge vertically, holding its center.
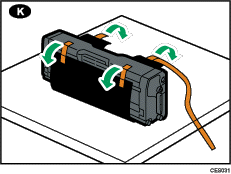
Place the black print cartridge on a flat surface and remove the protection sheet before shaking.
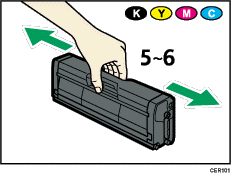
![]() Hold the print cartridge and shake it from side to side five or six times.
Hold the print cartridge and shake it from side to side five or six times.
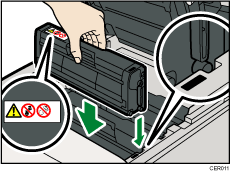
![]() Check the toner color and location correspond, and then carefully insert the print cartridge vertically.
Check the toner color and location correspond, and then carefully insert the print cartridge vertically.
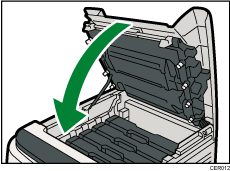
![]() Close the top cover with both hands carefully. Be careful not to trap your fingers.
Close the top cover with both hands carefully. Be careful not to trap your fingers.
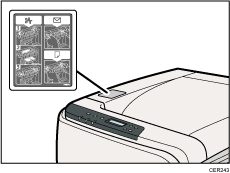
![]() Apply the indicated sticker as in the illustration below.
Apply the indicated sticker as in the illustration below.
