Installing the Wireless LAN Interface Board
This section describes how to install the wireless LAN interface board.
![]() Check the contents of the package.
Check the contents of the package.
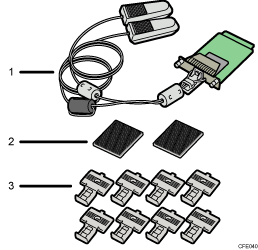
Wireless LAN board
Hook and loop fasteners
Cable clamps
![]() Turn off the main power switch, and then unplug the machine's power cord from the wall outlet.
Turn off the main power switch, and then unplug the machine's power cord from the wall outlet.
![]() Remove the seals from the hook and loop fasteners, and then attach them to the left side of the machine.
Remove the seals from the hook and loop fasteners, and then attach them to the left side of the machine.
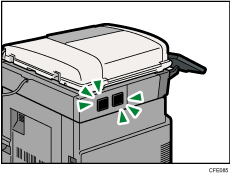
![]() Remove the seals from the cable clamps, and then attach them to the left side of the machine.
Remove the seals from the cable clamps, and then attach them to the left side of the machine.
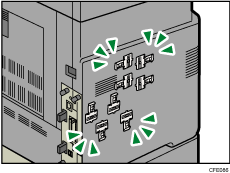
![]() Loosen two screws and remove the cover of the slot in which the wireless LAN interface board is installed.
Loosen two screws and remove the cover of the slot in which the wireless LAN interface board is installed.
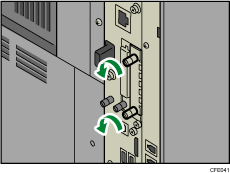
![]() Fully insert the wireless LAN interface board.
Fully insert the wireless LAN interface board.
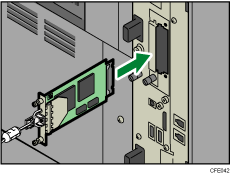
![]() Tighten two screws to secure the interface board.
Tighten two screws to secure the interface board.
Check the wireless LAN interface board is connected firmly to the board slot.
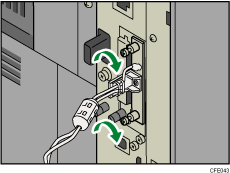
![]() Attach the antennas of the wireless LAN with the hook and loop fasteners that you attached in step 3, and then place the cables in the cable clamps and close the clamps.
Attach the antennas of the wireless LAN with the hook and loop fasteners that you attached in step 3, and then place the cables in the cable clamps and close the clamps.
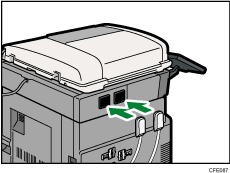
![]()
Confirm that the wireless LAN interface board was correctly installed by printing the configuration page. If it is correctly installed, “Wireless LAN” will appear for “Device Connection” on the configuration page. For details about printing the configuration page, see “Interface Settings”, Network and System Settings Reference.
If the board was not installed properly, repeat the procedure from step 3. If it cannot be installed correctly even after reattempting installation, contact your sales or service representative.
Before using the wireless LAN interface board, you must configure settings. For details, see “Interface Settings”, Network and System Settings Reference.

