Scan Position
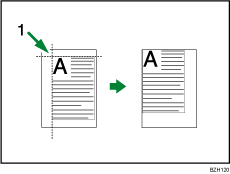
You can move the scanning position of originals.

Point from which the machine begins scanning
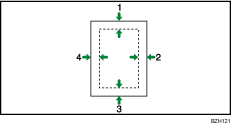
You can move the scanning position up to 30 mm (1.2 inches) in 1 mm (0.1 inches) increments upward, downward, to left and to right.

Top: 0
 30 mm, 0
  1.2 inches
Right: 0
 30 mm, 0
  1.2 inches
Bottom: 0
 30 mm, 0
  1.2 inches
Left: 0
 30 mm, 0
  1.2 inches
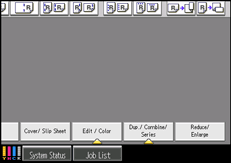
![]() Press [Edit / Color].
Press [Edit / Color].

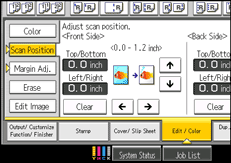
![]() Press [Scan Position].
Press [Scan Position].
![]() Specify the scanning position for the front side of the original.
Specify the scanning position for the front side of the original.

![]() Specify the scanning position for the back side of the original.
Specify the scanning position for the back side of the original.
If you do not need to set the scanned position of the back side of the original, proceed to step 5.
![]() Press [OK].
Press [OK].
![]()
To change the value you entered, press [
 ], [
], [ ], [
], [ ] or [
 ], or press [Clear], and then specify a new value.
Press [
 ] and [
 ] to set the top or bottom position. Press [
 ] and [
 ] to set the left or right position.
The scanning position for the back side of the original is valid only when you are copying 2-sided originals.
If you are copying one-sided originals with duplex printing enabled, odd pages will be printed using the scanning position specified for the front sides of originals, and even pages will be printed using the scanning position specified for the back sides of originals.

