Reading the Display Panel and Using Keys
This section explains screen items and their corresponding keys.
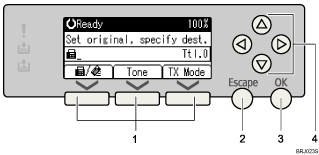
Selection keys
Correspond to items at the bottom line on the display.
Example: The standby display
When the instruction “Press [
 ]” appears in this manual, press the left selection key.
When the instruction “Press [Tone]” appears in this manual, press the middle selection key.
When the instruction “Press [TX Mode]” appears in this manual, press the right selection key.
[Escape] key
Press to cancel an operation or return to the previous display.
[OK] key
Press this to set numeric values, make settings, or select an entered item.
Scroll keys
Press to move the cursor to each direction one by one.
When [
 ], [
], [ ], [
], [ ], or [
 ] appears in this manual, press the scroll key of the same direction.
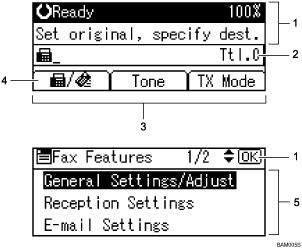
Machine status and message
Destination entry
Selection keys
Switches the destination type between
 (fax or IP-Fax) and
  (Internet Fax).
To specify fax numbers or IP-Fax destinations, select
.To specify Internet Fax destinations (e-mail addresses), select
.Selectable items
![]()
The display will differ depending on installed optional units.
You can change Internet Fax setting under E-mail Settings in the Fax Features menu. See “E-mail Settings”.
You can change IP-Fax settings under IP-Fax Settings in the Fax Features menu. See “IP-Fax Settings”.