


  |  | ||
![]()
|
![]()
Before touching the SDRAM module, ground yourself by touching something metal to discharge any static electricity. Static electricity can damage the SDRAM module.
Do not subject the memory unit to physical shocks.
The printer comes equipped with 384 MB of memory. This can be expanded to a maximum of 768 MB.
After a new memory unit has been installed, the driver settings might need to be reconfigured. For details, see "Making Option Settings for the Printer", Driver Installation Guide.
Turn off the power, and then unplug the power cable.
Remove the memory cover.
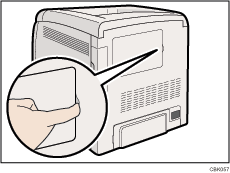
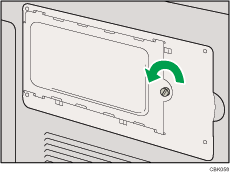
Loosen the screw securing the inner cover by using a coin.
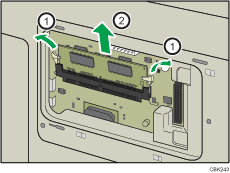
Push the levers on both ends of the slot outward (![]() ), and then remove the default module (
), and then remove the default module (![]() ).
).
Install a new SDRAM module.
Be sure to install the memory unit as shown.
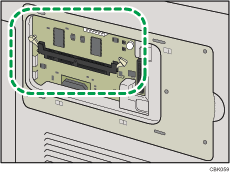
To install the recommended memory, align the notch of the recommended memory with the protruding part of the vacant slot, and then carefully insert the module at an angle.
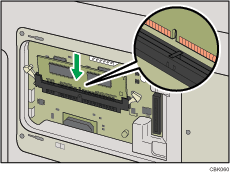
Keeping the module at an angle, press it down until it clicks into place.
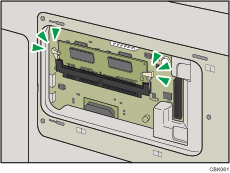
To install the optional hard disk, use the "Install the Hard Disk" procedure, which follows this procedure.
Attach the inner cover, and then fasten the screw.
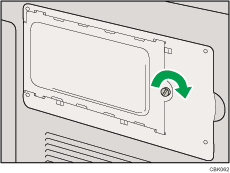
Attach the memory cover.
After installing the option, print the configuration page to confirm the installation.
![]()
After finishing the installation, you can check the memory unit is properly installed: Print the configuration page from the [List/Test Print] menu. If it is installed properly, the memory capacity will appear under "Total Memory" on the configuration page.
The table below shows the total SDRAM module capacities.
Standard |
Extended |
Total |
|---|---|---|
256 |
256 MB |
512 MB |
256 |
512 MB |
768 MB |
If the memory unit is not properly installed, repeat this procedure. If you cannot install it properly even after reinstallation, contact your sales or service representative.
For details on printing the configuration page, see "Test Printing".