Cleaning the Registration Roller and the Paper Tray
The surrounding registration roller or paper tray might get dirty with paper dust when using paper other than standard paper.
If white spots appear on the printout due to paper dust, wipe the paper tray and registration roller.
![]()
|
![]()
|
![]()
|
![]()
Do not use chemical cleaners or organic solvents such as thinners or benzine.
![]() Turn off the power switch.
Turn off the power switch.
![]() Pull out the plug from the socket. Remove all the cables from the printer.
Pull out the plug from the socket. Remove all the cables from the printer.
![]() Lift and pull Tray 1 carefully, and then pull it out with both hands.
Lift and pull Tray 1 carefully, and then pull it out with both hands.
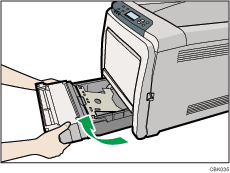
Place the tray on a flat surface. When there is paper in the tray, remove paper.
![]() Wipe the inside of the paper tray with a cloth.
Wipe the inside of the paper tray with a cloth.
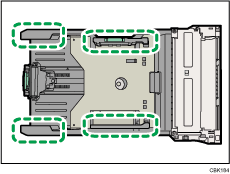
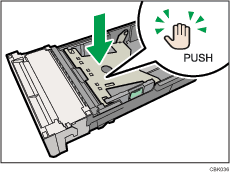
![]() Push the metal plate down until it clicks into place to lock.
Push the metal plate down until it clicks into place to lock.
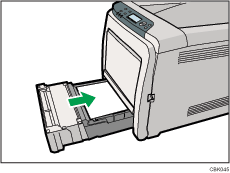
![]() Slide Tray 1 along the rails, and push it carefully all the way into the printer.
Slide Tray 1 along the rails, and push it carefully all the way into the printer.
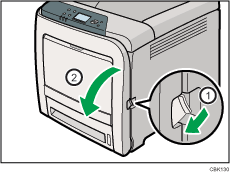
![]() Pull Front Cover Open Lever, and then open the front cover with both hands carefully.
Pull Front Cover Open Lever, and then open the front cover with both hands carefully.
The registration roller is set in the position shown by the illustration.
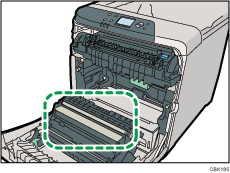
Do not touch the transfer roller.
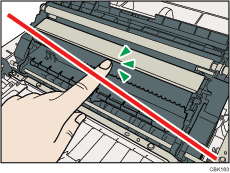
![]() Using a cloth, wipe the metal registration roller.
Using a cloth, wipe the metal registration roller.
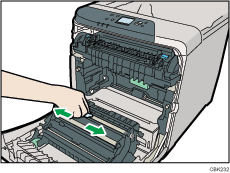
Clean the registration roller if printed paper becomes smeared after clearing a paper jam.
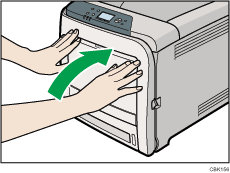
![]() Close the front cover with both hands carefully.
Close the front cover with both hands carefully.
![]() Insert the plug of the power cord into the wall socket securely. Connect all the interface cables that were removed.
Insert the plug of the power cord into the wall socket securely. Connect all the interface cables that were removed.
![]() Turn on the power switch.
Turn on the power switch.

