Replacing the Intermediate Transfer Unit
![]()
|
![]()
|
![]()
Replace the intermediate transfer unit and transfer roller together.
When removing the waste toner bottle, make sure not to tilt it.
Before removing the waste toner bottle from the printer, spread paper or some other material around the area to keep toner from dirtying your workspace.
Replace the intermediate transfer unit if the following message appears on the display:
“Replacemnt Requird:IntTrans”

When the following message appears on the display, the intermediate transfer unit should be replaced soon. Prepare a new intermediate transfer unit.
“Replcmnt Rqrd Soon:IntTrans”

![]() Pull the right side lever to open the front cover.
Pull the right side lever to open the front cover.
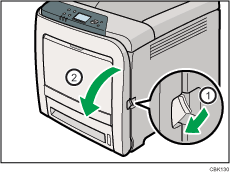
![]() Slide the lever on the front cover outwards.
Slide the lever on the front cover outwards.
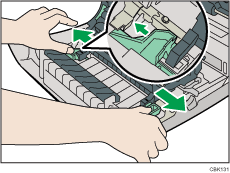
![]() Hold both ends of the paper transfer unit and lift it up.
Hold both ends of the paper transfer unit and lift it up.

![]() Hold the center of the waste toner bottle, and then carefully pull it out horizontally.
Hold the center of the waste toner bottle, and then carefully pull it out horizontally.
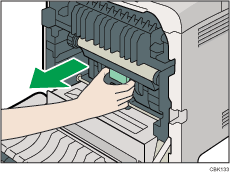
![]() Pull the waste toner bottle halfway out, grab the bottle, and then pull it straight out.
Pull the waste toner bottle halfway out, grab the bottle, and then pull it straight out.
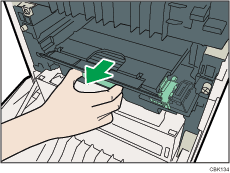
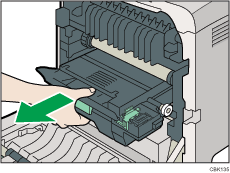
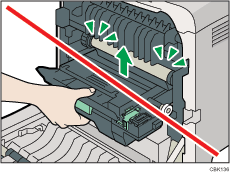
To prevent the waste toner bottle touching the intermediate transfer unit, do not lift the bottle while pulling it out.
![]() Loosen the finger screws on both ends of the intermediate transfer unit.
Loosen the finger screws on both ends of the intermediate transfer unit.
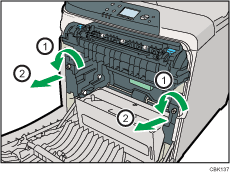
![]() Hold the finger screws of sliders, and then pull the intermediate transfer unit until it stops.
Hold the finger screws of sliders, and then pull the intermediate transfer unit until it stops.
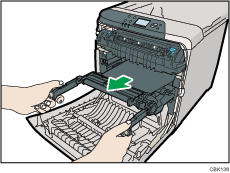
![]() Hold the green parts at both ends of the intermediate transfer unit.
Hold the green parts at both ends of the intermediate transfer unit.
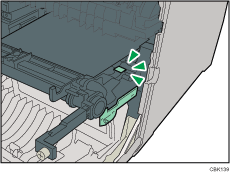
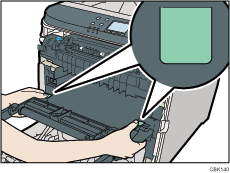
Holding the levers on both side, carefully pull out the intermediate transfer unit.
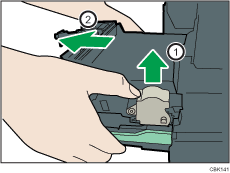
![]() Open the box containing the new intermediate transfer unit and remove the top cover.
Open the box containing the new intermediate transfer unit and remove the top cover.
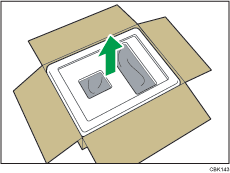
![]() Remove the covering sheet. Then, while taking care not to touch the belt area, lift the new intermediate transfer unit from its box using the grips on both sides.
Remove the covering sheet. Then, while taking care not to touch the belt area, lift the new intermediate transfer unit from its box using the grips on both sides.
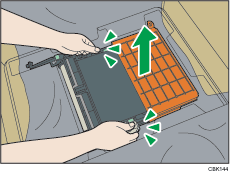
![]() While holding the frame of the intermediate transfer unit steady with one hand, use your other hand to pull the side tab outwards and then upwards to remove the attachment.
While holding the frame of the intermediate transfer unit steady with one hand, use your other hand to pull the side tab outwards and then upwards to remove the attachment.
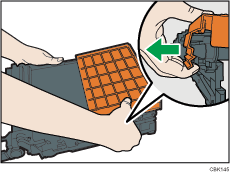
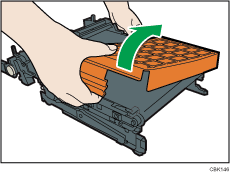
Do not touch the transfer belt.
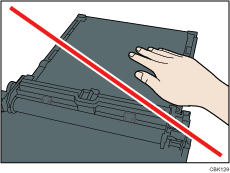
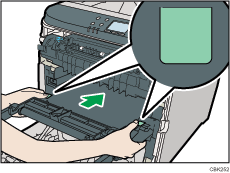
![]() Hold the intermediate transfer unit by the green parts at both ends, and then push the unit straight into the printer body until it can go no further.
Hold the intermediate transfer unit by the green parts at both ends, and then push the unit straight into the printer body until it can go no further.
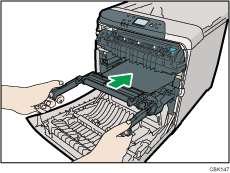
![]() Tighten the finger screws on both ends of the intermediate transfer unit.
Tighten the finger screws on both ends of the intermediate transfer unit.
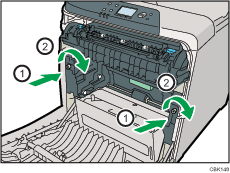
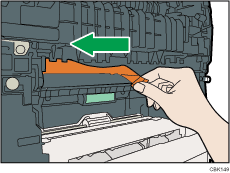
![]() Remove the transfer belt cover.
Remove the transfer belt cover.
![]() Hold the center of the waste toner bottle, and then carefully insert into the printer body.
Hold the center of the waste toner bottle, and then carefully insert into the printer body.
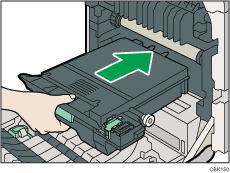
To prevent the waste toner bottle touching the intermediate transfer unit, do not lift the bottle while inserting it.
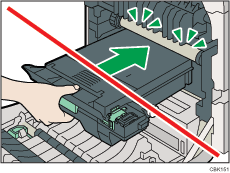
![]() Push in the waste toner bottle until it clicks into place.
Push in the waste toner bottle until it clicks into place.
Push the green part all the way in.
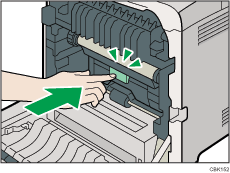
![]() Place the paper transfer unit on the front cover by aligning the
Place the paper transfer unit on the front cover by aligning the ![]() mark on the paper transfer unit with the
mark on the paper transfer unit with the ![]() mark on the front cover.
mark on the front cover.
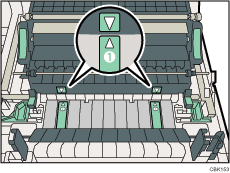
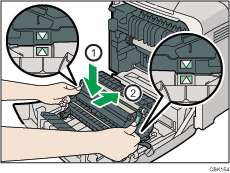
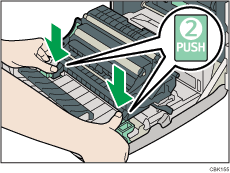
Then, push on the green PUSH marks until the paper transfer unit clicks into place.
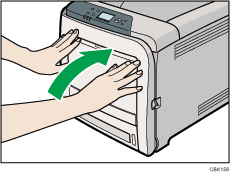
![]() Close the front cover with both hands carefully.
Close the front cover with both hands carefully.
