Installing the Hard Disk
![]()
Before touching the hard disk, touch something metal to discharge any static electricity. Static electricity can damage the hard disk.
Do not subject the hard disk to physical shocks.
Install the hard disk carefully if the SDRAM module is already installed. If the hard disk comes into contact with the SDRAM module, the SDRAM module may be damaged.
After a new hard disk has been installed, the driver settings might need to be reconfigured. For details, see "Making Option Settings for the Printer", Driver Installation Guide.
![]() Turn off the power, and then unplug the power cable.
Turn off the power, and then unplug the power cable.
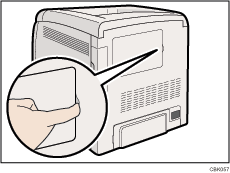
![]() Remove the memory cover.
Remove the memory cover.

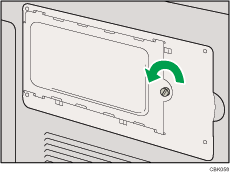
![]() Loosen the screw securing the inner cover by using a coin.
Loosen the screw securing the inner cover by using a coin.

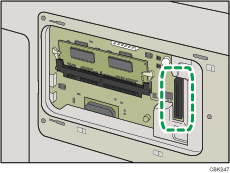
![]() Be sure to install the hard disk as shown.
Be sure to install the hard disk as shown.

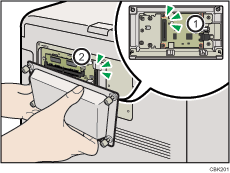
![]() Align the connector of the hard disk (
Align the connector of the hard disk (![]() ) with the connector on the board of the printer (
) with the connector on the board of the printer (![]() ), and then carefully push in the hard disk until it can go no further.
), and then carefully push in the hard disk until it can go no further.
If tightening the screw is difficult, loosen the screw, adjust its position, and then try tightening it again.

Be sure to set the hard disk parallel with the printer.
![]()
After finishing installation, you can check the hard disk is properly installed: Print the configuration page from the [List/Test Print] menu. If it is installed properly, you will see "Hard Disk" for "Device Connection" on the configuration page.
If the hard disk is not properly installed, repeat this procedure. If you cannot install it properly even after reinstallation, contact your sales or service representative.
For details on printing the configuration page, see "Test Printing".

