

  |  | ||
This section describes how to program a Scan Size.
Press [Facsimile Features].
Press [Scan Settings].
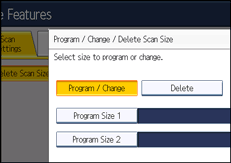
Press [Program / Change / Delete Scan Size].
Make sure that [Program / Change] is selected.
Select [Program Size 1] or [Program Size 2].

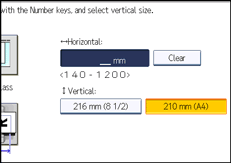
Enter a horizontal size using the number keys.

Each time you press [mm] or [inch], the units switch between “mm” and “inch”.
If you enter a length and press [mm] or [inch], the length is converted automatically according to the unit (fractions are rounded off). For example, when you enter [2], [2], and [0] in millimeters and change to “inch”, the length 8.7 “inch” is shown on the display. If you press [mm] again, “221 mm” is displayed.
If you make a mistake, press [Clear], and then try again.
To cancel a scan size, press [Cancel].
Select a vertical size, and then press [OK].
The displayed vertical size differs depending on the selected unit. When [mm] is selected, [210 mm (A4)] and [216 mm (8 1/2)] are shown. When [inch] is selected, [8.3 inch (A4)] and [8.5 inch] are shown.
To cancel a scan size, press [Cancel].
Press [Exit].
Press the [User Tools/Counter] key.
![]()
You can use documents longer than 356 mm (14 inches) with the User Parameter (switch 14, bit 1) in the Parameter Settings. For details about Parameter Setting, see “Parameter Settings”.