

  |  | ||
This section explains the basic procedure for sending scan files by e-mail.
Make sure that no previous settings remain.
If a previous setting remains, press the [Clear Modes] key.
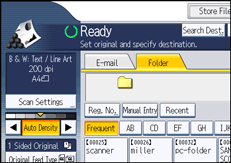
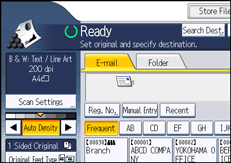
If the network delivery scanner screen or Scan to Folder screen appears, switch to the E-mail screen.
For details, see "Switching to the E-mail Screen".

Place originals.
If necessary, press [Scan Settings] to specify scanner settings such as resolution and scan size.
For details, see "Various Scan Settings".

If necessary, specify the scanning density.
For details, see "Adjusting Image Density".
If necessary, press [Original Feed Type] to specify settings such as original orientation.
For details, see "Setting of Original Feed Type".
If necessary, press [Send File Type / Name] to specify settings such as file format and file name.
For details, see "Specifying the File Type and File Name".
Specify the destination.
You can specify multiple destinations.
For details, see "Specifying E-mail Destinations".
If necessary, press [Text] to enter the e-mail message.
For details, see "Entering the E-mail Message".
If necessary, press [Subject] to specify the e-mail subject.
For details, see "Entering the E-mail Subject".
To specify the e-mail sender, press [Sender Name].
For details, see "Specifying the E-mail Sender".
If necessary, press [Security] to specify [Encryption] or [Signature].
For details, see "Security Settings to E-mails".
To use Message Disposition Notification, press [Recept. Notice].
If you select [Recept. Notice], the selected e-mail sender will receive e-mail notification when the e-mail recipient has opened the e-mail.
Press the [Start] key.
![]()
If you have selected two or more destinations, the destinations can be made to appear one by one by pressing [![]() ] or [
] or [![]() ] next to the destination field.
] next to the destination field.
To cancel a selected destination, press [![]() ] or [
] or [![]() ] to display the destination in the destination field, and then press the [Clear/Stop] key. You can cancel a destination selected from the destination list by pressing the selected destination again.
] to display the destination in the destination field, and then press the [Clear/Stop] key. You can cancel a destination selected from the destination list by pressing the selected destination again.
In [System Settings], you can specify the administrator's e-mail address as the default sender name. This lets you send e-mail without entering anything for [Sender Name]. For details, see "File Transfer", Network and System Settings Reference.
Depending on the security setting, the logged-in user may be specified as [Sender Name].
To use Message Disposition Notification, log in to the machine as a user and specify the sender. Note, however, that the [Recept. Notice] notification e-mail may not be transmitted if the e-mail software of the recipient does not support Message Disposition Notification.
If you press [Check Modes] before pressing the [Start] key, the initial scanner screen switches to the Check Modes screen. You can use the Check Modes screen to check the settings such as destinations. For details, see "Check Modes".
If you press [Preview] and then start scanning while [Preview] is selected, the Preview screen appears. You can use this screen to check how the originals are scanned and the scan setting used for scanning. After checking the preview, you can specify whether to send the file or not. For details, see "Preview".
To cancel scanning, press the [Clear/Stop] key.
You can also store a scan file and simultaneously send it by e-mail. For details, see "Simultaneous Storage and Sending by E-mail".
When [Security] is set to [Encryption], if you select multiple destinations and encryption is not configured for some of the destinations, a confirmation message appears before the file is sent.
After an e-mail is sent, the destination, sender, subject, text, and file name fields will be automatically cleared. If you want to preserve the information in these fields, contact your local dealer.
![]()