

  |  | ||
This section explains the basic procedure for delivering scan files using the network delivery scanner.
![]()
You must register destinations and senders in advance using the ScanRouter delivery software installed on the delivery server.
Make sure that no previous settings remain.
If a previous setting remains, press the [Clear Modes] key.
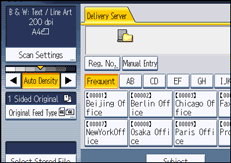
If the E-mail screen or Scan to Folder screen appears, switch to the network delivery scanner screen.
For details, see "Switching to the Network Delivery Scanner Screen".

Place originals.
If necessary, press [Scan Settings] to specify scanner settings such as resolution and scan size.
For details, see "Various Scan Settings".

If necessary, specify the scanning density.
For details, see "Adjusting Image Density".
If necessary, press [Original Feed Type] to specify settings such as original orientation.
For details, see "Setting of Original Feed Type".
Specify the destination.
You can specify multiple destinations.
For details, see "Specifying Delivery Destinations".
If necessary, press [Subject] to specify the e-mail subject.
For details, see "Entering the Subject of the E-mail to Be Transmitted via the Delivery Server".
If necessary, press [Sender Name] to specify the sender.
For details, see "Specifying the Sender".
Press the [Start] key.
![]()
By pressing [Manual Entry] on the network delivery scanner screen, you can send a file by e-mail via the delivery server's network. For details about entering the e-mail address directly, see "Entering an E-mail Address Manually".
If you have selected more than one destination, press [![]() ] or [
] or [![]() ] next to the destination field to scroll through the destinations.
] next to the destination field to scroll through the destinations.
To cancel a selected destination, display the destination in the destination field, and then press the [Clear/Stop] key. You can cancel a destination selected from the address book by pressing the selected destination again.
You can use the Message Disposition Notification function when sending e-mail via delivery server. An e-mail is sent to the sender selected in step 9, notifying him/her that the recipient has read his/her e-mail. To specify this setting, press [Recept. Notice].
To enable the Return Receipt function, you must specify the SMTP e-mail transmission settings using ScanRouter delivery software. For details about specifying this setting, see the ScanRouter delivery software manual. Note, however, that if the e-mail software used at the destination does not support Message Disposition Notification (MDN), e-mail notification that the e-mail has been opened may not be sent.
Register the sender's e-mail address using the ScanRouter delivery software in advance.
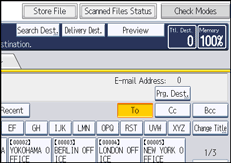
If you press [Check Modes] before pressing the [Start] key, the initial scanner screen switches to the Check Modes screen. You can use the Check Modes screen to check the settings such as destinations. For details, see "Check Modes".
If you press [Preview] and start scanning while [Preview] is highlighted, the Preview screen appears. For details, see "Preview".
To cancel scanning, press the [Clear/Stop] key.
You can also store a scan file and simultaneously deliver it. For details, see "Simultaneous Storage and Delivery".
After scan files are delivered, the destination, sender, and subject fields will be automatically cleared. If you want to preserve the information in these fields, contact your local dealer.