Margin Adjustment
Copies originals leaving a binding margin.

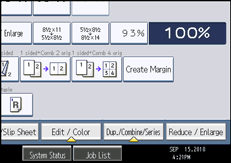
![]() Press [Edit / Color].
Press [Edit / Color].
![]() Make sure that [Margin Adj.] is selected. If [Margin Adj.] is not selected, press [Margin Adj.].
Make sure that [Margin Adj.] is selected. If [Margin Adj.] is not selected, press [Margin Adj.].
![]() Specify a binding margin for the front side pages.
Specify a binding margin for the front side pages.
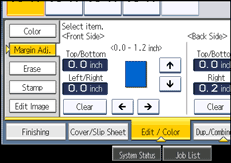
![]() Specify a binding margin for the back side pages. Then press [OK].
Specify a binding margin for the back side pages. Then press [OK].
If you do not need to specify the margins for the back side pages, press [OK].
![]()
To change the value you entered, press [
 ], [
], [ ], [
], [ ] or [
 ], or press [Clear], and then specify a new value.
Press [
] and [] to set the top or bottom position. Press [] and [] to set the left or right position.You can set the binding margin up to 30 mm (1.2 inches) in 1 mm (0.1 inch) increments.
Margin on the back side of the page is valid when 1 Sided
2 Sided or Combine 2 Sides is selected.You can change the settings for Margin Adjustment under Edit in User Tools. For details about Edit, see “Edit”.
If you set a binding margin that is too wide, part of the image may not be copied.
When making copies in Combine mode, the binding margin is added to the copies after the combination is finished.