
| |||
This section describes how to install the small size paper tray.
To use the small size paper tray, install it in tray 2 or the lower paper trays. In the following example procedure, the small size paper tray is installed in tray 2.
![]()
The small size paper tray cannot detect paper size automatically. Specify the paper size on the control panel. For details, see Changing to a Size That Is Not Automatically Detected.
For users of type 1 and 2
The small size paper tray cannot be installed in the lower paper tray.
Check the contents of the package.

Small size paper tray
Remove the packaging from the small size paper tray.
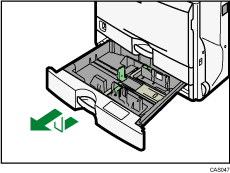
Carefully pull out tray 2 until it stops, then slightly raise the front of the tray, and then pull it out completely.
Store the paper tray in a safe place.
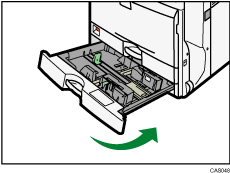
Lift the front of the small size paper tray, and then carefully push it fully in.
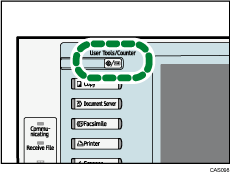
Press the [User Tools/Counter] key.
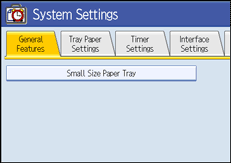
Press [System Settings].

Check that [General Features] is selected.
Press [Small Size Paper Tray].
If the setting to be specified does not appear, press [![]() Next] to scroll down to other settings.
Next] to scroll down to other settings.
Press [On] for Tray 2.
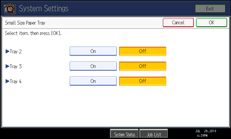
Press [OK].
Turn off the machine, and then turn it back on.
![]()
If the small size paper tray is not installed correctly, repeat the installation procedure from the beginning. If the installation is still not correct, contact your service representative.
In printer mode, configure the settings for the options that are installed on the machine. For details, see the printer driver Help.
| Copyright (C) 2010 |