Erasing Print Image Traces
This section describes how to erase print image traces.
When the same image is printed repeatedly or if the paper is changed to a larger size, there may be a difference in glossiness. These are called "print image traces".
By executing Erase Print Image Traces, 50 sheets are printed on both sides entirely in black to erase print image traces.
![]()
Paper sizes and orientations that can be used with this function are A3
 , B4 JIS, SRA3, 12"×18", and 11"×17". For this function, use paper of the same width or larger than that you would use for normal printing.
Load the paper for this function into Tray 2, and then remove any paper from Tray 1. If you are using coated paper, load it into Tray 3, and then remove any paper from both Tray 1 and 2.
Use paper recommended by the manufacturer.
![]() Load the paper for erasing print image traces.
Load the paper for erasing print image traces.
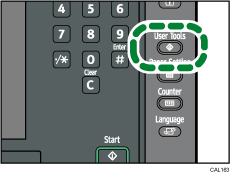
![]() Press the [User Tools] key.
Press the [User Tools] key.
![]() Press [Maintenance].
Press [Maintenance].
![]() Press [Erase Print Image Traces].
Press [Erase Print Image Traces].
![]() Press [Start Printing].
Press [Start Printing].
50 sheets will be printed on both sides entirely in black.
![]() When printing ends, check the final sheet. If the print image traces have been erased, press [Stop].
When printing ends, check the final sheet. If the print image traces have been erased, press [Stop].
If the print image traces have not been erased, repeat steps 5 and 6.
![]() Press [Exit] twice.
Press [Exit] twice.