

  |  | ||
This section describes automatic color adjustment.
After moving the printer, printing on thick paper, or printing repeatedly for some time, color degradation may occur. By performing automatic color adjustment, you can restore optimum print quality.
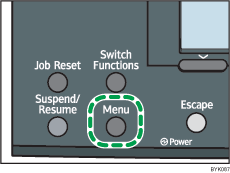
Press the [Menu] key.

Press the [![]() ] or [
] or [![]() ] key to select [Maintenance], and then press the [OK] key.
] key to select [Maintenance], and then press the [OK] key.

Press the [![]() ] or [
] or [![]() ] key to select [Quality Maintenance], and then press the [OK] key.
] key to select [Quality Maintenance], and then press the [OK] key.

Press the [![]() ] or [
] or [![]() ] key to select [Color Registration], and then press the [OK] key.
] key to select [Color Registration], and then press the [OK] key.

Select [Auto Adjust], and then Press the [OK] key.

Press [OK].

Automatic color adjustment begins.
Automatic color adjustment takes about 50 seconds.
A confirmation message appears when the adjustment is complete. Press [Exit].
Press the [Menu] key to return to the initial screen.