

  |  | ||
Printer setup |
Press the [Menu] key, select [Paper Input], [Paper Type: (tray name)], and then select [Envelope]. |
Printer driver setup |
Click [Envelope], in the "Paper Type:" list. |
Supported paper feed tray |
Any input tray can be used. Make sure paper is not stacked higher than the upper limit mark ( |
Duplex printing |
Not supported |
Maintenance |
Default: [Envelope 1] If prints made using the paper tray show heavy smudging, use the following procedure to change the paper type setting from the control panel:
When specifying paper thickness, remember that a higher number indicates greater thickness. Also, because the paper thickness will normally be detected automatically, change this setting only if a print problem occurs. |
Additional cautions |
|
![]()
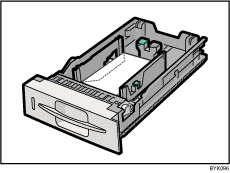
Load envelopes print side up in the standard paper feed tray or optional paper feed tray.
Load envelopes with flaps closed to the left side of the tray.

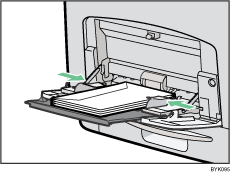
Load envelopes print side down on the bypass tray.
Load envelopes with flaps closed to the left side of the tray.
