

  |  | ||
If the wireless network uses WEP to encrypt transmitted data, the corresponding WEP key must be set to the printer to allow communications with other network devices.
Ask your network administrator for the WEP key to use.
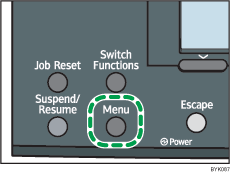
Press the [Menu] key.

Press the [![]() ] or [
] or [![]() ] key to select [Host Interface], and then press the [OK] key.
] key to select [Host Interface], and then press the [OK] key.

Press the [![]() ] or [
] or [![]() ] key to select [Wireless LAN], and then press the [OK] key.
] key to select [Wireless LAN], and then press the [OK] key.

Press the [![]() ] or [
] or [![]() ] key to select [Security Method], and then press the [OK] key.
] key to select [Security Method], and then press the [OK] key.

Press the [![]() ] or [
] or [![]() ] key to select [WEP], and then press [Details].
] key to select [WEP], and then press [Details].

When activating the WEP setting, you will need to enter the WEP key. If you have not entered the key, be sure to enter it.
Press the scroll keys to enter characters, and then press the [OK] key.

When entering a character, pressing the [OK] key will mask it with an asterisk for security reasons.
When using 64-bit WEP, up to 10 hexadecimal characters or five ASCII characters can be entered. When using 128-bit WEP, up to 26 hexadecimal characters or 13 ASCII characters can be used.
Up to 10 or 26 hexadecimal characters and 5 or 13 ASCII characters can be entered.
For ASCII character strings, uppercase and lowercase letters are differentiated, so be sure to enter characters in the required case.
Press the [![]() ] or [
] or [![]() ] key to select [WEP], and then press the [OK] key.
] key to select [WEP], and then press the [OK] key.
Press the [Menu] key to return to the initial screen.
Print a configuration page to confirm the settings.
![]()
The WEP key can also be set using a Web browser. For details, see the Web Image Monitor Help.
For details about printing the configuration page, see "Test Printing".