

  |  | ||
This section explains how to install the following SD cards: the camera direct print card, data overwrite security unit, HDD encryption unit, NetWare card, and VM card.
![]()
|
![]()
Do not subject the card to physical shocks.
![]()
The VM card is optional to Type 1 models only. To use it, the optional 512 MB SDRAM module must be installed.
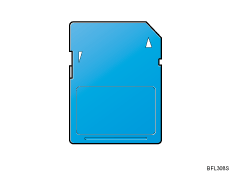
Check the contents of the package.

Turn off the power, and then unplug the power cord.
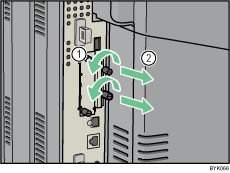
Remove the two screws, and then carefully remove the cover of the SD card slot.

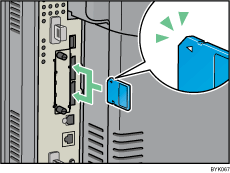
Carefully push in the SD card (notched corner upward and leading), until it clicks into place.

Insert the SD card in the appropriate slot as follows:
Upper slot: Camera direct print card, Data overwrite security unit, NetWare card
Lower slot: HDD encryption unit, VM card
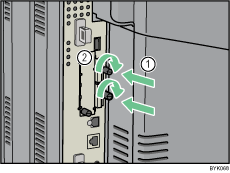
Reattach the cover over the SD card. Fasten the two screws to secure the cover.

![]()
Do not touch the card while the printer is in use. It may come loose, even if pushed only slightly. The slot cover must be reattached.
You can confirm that the SD card was installed correctly by checking the control panel menu. Depending on the SD card, certain menu items appear on the display.
Data overwrite security unit: [Memory Erase Status] appears on the top level menu.
HDD encryption unit: [Machine Data Encryption] appears in [Security Options].
Confirm that the camera direct print card was correctly installed by printing the configuration page. If the camera direct print card is installed properly, "PictBridge" will appear for "Attached Equipment" in "System Reference".
If the card is not installed properly, repeat the procedure from the beginning. If it cannot be installed correctly even after reattempting installation, contact your sales or service representative.
For details about printing the configuration page, see "Test Printing".