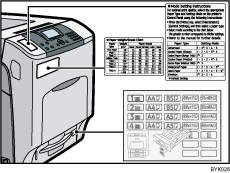


  |  | ||
To protect it from shock and vibration during transit, this printer comes packaged in cushioning foam and secured with tape. Remove these protective materials after bringing the machine to where it will be installed.
![]()
|
![]()
|
![]()
|
![]()
Removed tape is dirty. Be careful not to let it touch your hands or clothes.
Remove the plastic bag.
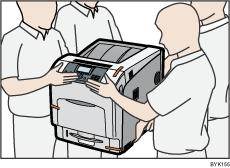
Lift the printer with four people by using the inset grips on both sides of the printer.
Leave the tape holding the paper feed tray and cover in place while moving the printer. Lower the machine slowly and carefully to prevent trapping your hands.
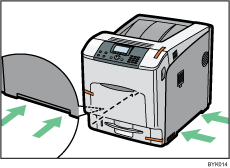
When moving the printer, do not hold on the following parts as doing so could cause a malfunction:
The handle onto the standard paper feed tray.
The underside of the bypass tray.
The underside of the box containing the controller board (on the back of the printer).
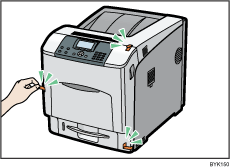
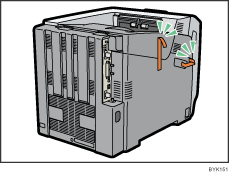
Remove the orange adhesive tape from the printer body.
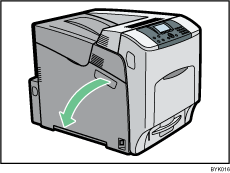
Carefully open the left cover.
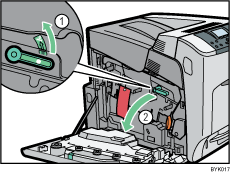
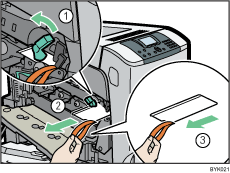
Turn the green lever counterclockwise (![]() ), and then slowly open the inner cover (
), and then slowly open the inner cover (![]() ).
).
Remove the securing pin, as shown, from the transfer unit. Pinch it (![]() ), and then pull it out (
), and then pull it out (![]() -
-![]() ).
).
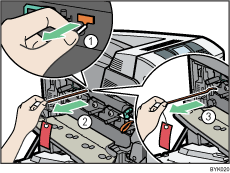
Turn the green lever of the transfer unit counterclockwise to unlock the unit (![]() ). Remove the protective sheet, as shown. Pinch the orange tape (
). Remove the protective sheet, as shown. Pinch the orange tape (![]() ), and then pull it out (
), and then pull it out (![]() ).
).
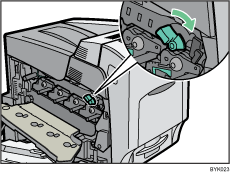
Turn the green lever clockwise to lock the unit.
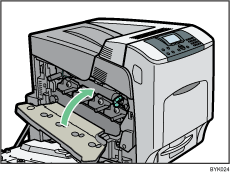
Close the inner cover.
Lock the inner cover by pushing on both ends (![]() ), and then turning the green lever clockwise (
), and then turning the green lever clockwise (![]() ).
).
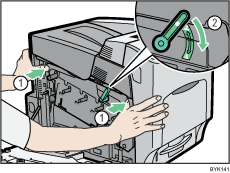
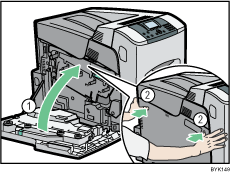
Close the left cover.
Using both hands, push the left cover firmly, until it clicks into place.
Put labels "1" on the front of the paper tray.
