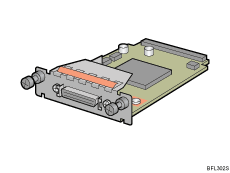
Installing the IEEE 1284 Interface Board
![]()
Before beginning work, ground yourself by touching something metal to discharge any static electricity. Static electricity can damage the IEEE 1284 interface board.
Do not subject the IEEE 1284 interface board to physical shocks.
For connection to the IEEE 1284 interface board, use a half pitch 36-pin interface cable.
![]() Check the contents of the package.
Check the contents of the package.
![]() Turn off the power, and then unplug the power cord.
Turn off the power, and then unplug the power cord.
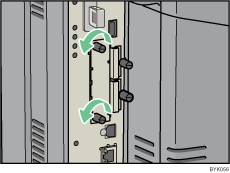
![]() Remove the two screws and remove the cover of the slot in which the 1284 interface board is installed.
Remove the two screws and remove the cover of the slot in which the 1284 interface board is installed.
The removed cover is not used when the 1284 interface board is installed.
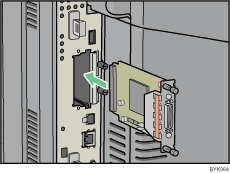
![]() Fully insert the IEEE 1284 interface board.
Fully insert the IEEE 1284 interface board.
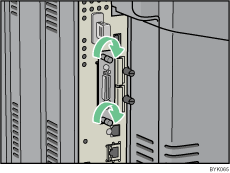
![]() Tighten the two screws to secure the interface board.
Tighten the two screws to secure the interface board.
Check the IEEE 1284 interface board is connected firmly to the controller board.
![]()
Confirm that the IEEE 1284 interface board was correctly installed by printing the configuration page. If it is correctly installed, "Parallel Interface" will appear for "Device Connection" on the configuration page.
If the board was not installed properly, repeat the procedure from step 2. If it cannot be installed correctly even after reattempting installation, contact your sales or service representative.
For details about printing the configuration page, see "Test Printing".