

  |  | ||
Follow the procedure below to replace an empty Print cartridge.
Clear any errors, such as when there is a paper jam or when no paper is loaded, before replacing a Print cartridge.
![]()
|
![]()
|
![]()
|
![]()
|
![]()
|
![]()
Take care to install the cartridges in the correct position.
Remove the Print cartridges' packaging.
If multiple cartridges are empty, replace all the empty cartridges. You can shorten the time for needed replacement.
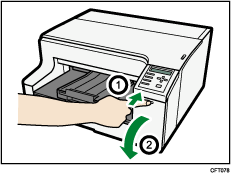
While pressing the recessed area (![]() ) of the right front cover, open the cover (
) of the right front cover, open the cover (![]() ).
).

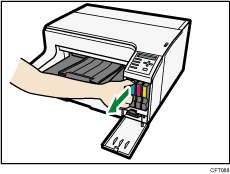
Take out the empty cartridges.
When doing this, be sure to hold the printer firmly so that it does not move.

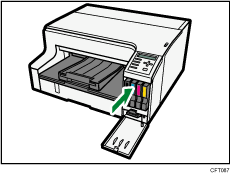
Check the cartridges' orientation, and then install them gently.
Install in the following order from the left: black, cyan, magenta, and yellow.
Push in the cartridge.

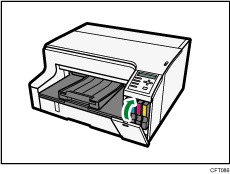
Close the right front cover.
