
| |||
Follow the procedure below to install the printer driver and User Guide.
![]()
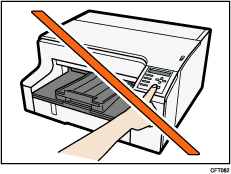
Do not turn the printer on until you have read how to do so.
Only administrators can perform this installation. Log on as a member of the Administrators group.
Notes on the Installation (USB Connection)
If the message "Digital Signature Not Found" or the [Software Installation], [Hardware Installation] or [Windows can't verify the publisher of this driver software] dialog box appears:
Click [Yes], [Continue Anyway] or [Install this driver software anyway] to continue the installation.
If the [Found New Hardware Wizard] dialog box appears:
Click [Install from a list or specific location (Advanced)], and then click [Next >].
Click [Include this location in the search], and then click [Browse].
Browse to "DRIVERS" on the CD-ROM, and then click [OK]. Select the folder appropriate for your operating system.
Be sure to clear the [Search remove media (floppy, CD-ROM...)] check box.
For details about the files stored on the CD-ROM labeled, see Software on the CD-ROM.
Start Windows, and insert the provided CD-ROM into the CD-ROM drive.
Quit all applications currently running.
When you start Windows, the "Add New Hardware Wizard" may appear. If this happens, click [Cancel]. Check again that the power is off.
Select a language for the interface, and then click [OK].
Click [Quick Install for USB].
Read the entire license agreement carefully. If you accept its terms, click [I accept the agreement.], and then click [Next >].
Check that the power of the printer is off, and then click [Next >].
Check again that the power of the printer is off, and then click [Next >].
Check that the dialog box below appears.
If the [Software Installation] or [Windows can't verify the publisher of this driver software] dialog box appears, see "Notes on the Installation".
Make sure that the computer and printer are properly connected, and then press the [Power] key.
Installation starts.
If the connection to the computer was not confirmed, make the port settings again after installation is complete.
If the message "Digital Signature Not Found" or the [Found New Hardware Wizard] or [Hardware Installation] dialog box appears, see "Notes on the Installation".
Select whether or not to open the printer status monitor automatically, and then click [Next >].
Check the installation result, and then click [Next >].
Install User Guide.
Click [Finish].
The printer driver and User Guide are now installed.
If the message "Digital Signature Not Found" or the [Found New Hardware Wizard] or [Hardware Installation] dialog box appears, see "Notes on the Installation".
![]()
Auto Run might not work automatically with certain OS settings. If this is the case, double-click the CD-ROM drive icon under [My Computer] or [Explorer], and then double-click [Setup.exe].
When installation is complete, the User Guide icon appears on your desktop.
If a message prompting you to restart the computer appears, restart the computer.
Confirm the printer driver is correctly installed by checking the printer's [Power] key is lit, and then performing a test print.
| Copyright (C) 2008-2011 |