

  |  | ||
This section describes how to modify the information of registered destinations.
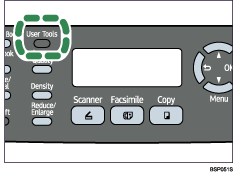
Press the [User Tools] key.

Press the [![]() ][
][![]() ] keys to select [Fax Directory], and then press the [OK] key.
] keys to select [Fax Directory], and then press the [OK] key.
If you are requested to enter a password, enter the password using the number keys, and then press the [OK] key.
Press the [![]() ][
][![]() ] keys to select [Quick Dial Entry] or [Speed Dial Entry], and then press the [OK] key.
] keys to select [Quick Dial Entry] or [Speed Dial Entry], and then press the [OK] key.
Press the [![]() ][
][![]() ] keys to select the desired entry, and then press the [OK] key.
] keys to select the desired entry, and then press the [OK] key.
Press the [![]() ][
][![]() ] keys to select [Fax # Entry], and then press the [OK] key.
] keys to select [Fax # Entry], and then press the [OK] key.
Modify the number as necessary, and then press the [OK] key.
To delete the current number completely, press the [Clear/Stop] key. Then, enter the new number.
Press the [![]() ][
][![]() ] keys to select [Fax Name Entry], and then press the [OK] key.
] keys to select [Fax Name Entry], and then press the [OK] key.
Modify the name as necessary, and then press the [OK] key.
To delete the current name completely, press the [Clear/Stop] key. Then, enter the new name.
Confirm the setting, and then press the [Clear/Stop] key.
![]()
You can press the [![]() ] key to exit to the previous level of the menu tree.
] key to exit to the previous level of the menu tree.
A password for accessing the [Fax Directory] menu can be specified in [Admin Menu Lock].
![]()
For details about entering characters, see Entering Characters.
For details about [Admin Menu Lock], see Administrator Settings.