

  |  | ||
This section describes how to specify a custom paper size.
![]()
Custom size paper cannot be loaded in tray 2.
When you perform printing, make sure that the paper size specified with the printer driver matches the paper size specified with the control panel. If a paper size mismatch occurs, a message appears on the display. To ignore the error and print using mismatched paper, press the [Start] key. If the paper is too small for the print job, the printed image will be cropped.
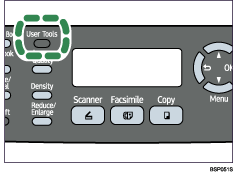
Press the [User Tools] key.

Press the [![]() ][
][![]() ] keys to select [Machine Settings], and then press the [OK] key.
] keys to select [Machine Settings], and then press the [OK] key.
Press the [![]() ][
][![]() ] keys to select [Paper Settings], and then press the [OK] key.
] keys to select [Paper Settings], and then press the [OK] key.
Press the [![]() ][
][![]() ] keys to select [Paper Size], and then press the [OK] key.
] keys to select [Paper Size], and then press the [OK] key.
Press the [![]() ][
][![]() ] keys to select the desired tray, and then press the [OK] key.
] keys to select the desired tray, and then press the [OK] key.
Press the [![]() ][
][![]() ] keys to select [Custom], and then press the [OK] key.
] keys to select [Custom], and then press the [OK] key.
Press the [![]() ][
][![]() ] keys to select [mm] or [Inch], and then press the [OK] key.
] keys to select [mm] or [Inch], and then press the [OK] key.
Enter the horizontal value using number keys, and then press the [OK] key.
You can press the [![]() ][
][![]() ] keys to change the value in 1 mm or 0.01 inch increments.
] keys to change the value in 1 mm or 0.01 inch increments.
Enter the vertical value using number keys, and then press the [OK] key.
You can press the [![]() ][
][![]() ] keys to change the value in 1 mm or 0.01 inch increments.
] keys to change the value in 1 mm or 0.01 inch increments.
Confirm the setting, and then press the [OK] key.
Press the [Clear/Stop] key to return to the initial screen.
![]()
You can press the [![]() ] key to exit to the previous level of the menu tree.
] key to exit to the previous level of the menu tree.