Setting Paper on the Bypass Tray
This section gives instructions for setting paper on the bypass tray.
For details about paper size and paper type, see "Paper Size and Paper Type", About This Machine.
![]()
Paper sizes that can be loaded onto the bypass tray are 90 - 305 mm (3.55 - 12 in.) vertical, and 148 - 600 mm (5.83 - 23.62 in.) horizontal.
When paper larger than 600 mm (23.62 in.) in length is used, the paper may become wrinkled, may not be fed into the machine, or may cause paper jams.
The machine can automatically detect the following sizes as regular size copy paper:
 A3
A3 , A4, A5, A6
 11"
11"  17", 81/2" 11", 51/2" 81/2"
If you want to use the size of paper other than the above, be sure to specify the size.
The following functions are disabled when printing from the bypass tray:
Duplex/Booklet printing (when the optional Finisher SR3020)
Auto Tray Select
Auto Tray Switching
Rotating Collate
Staple (when the optional Finisher SR790, SR3020, or SR3030 is installed)
Punch (when the optional Finisher SR3020 or SR3030, and Punch Unit are installed)
Printing onto paper with specific orientation
When printing onto paper that has specific orientation requirements, such as letterhead paper, be sure to set as the followings:
If the paper feed orientation is
, insert paper print side down in the bypass tray, and set the bottom edge of the paper toward the machine.If the paper feed orientation is
 , insert paper print side down in the bypass tray, and set the bottom edge of the paper toward you.
To print on paper that is set in the opposite position to either of the correct positions described above, rotate the print image 180 degrees using the printer driver. For details, see the printer driver Help.
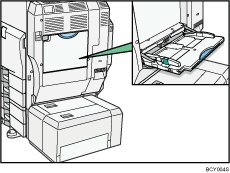
![]() Open the bypass tray.
Open the bypass tray.
![]() Insert the paper face
Insert the paper face![]() down until you hear the beep, and then align the paper guides to the paper size by pinching the clip.
down until you hear the beep, and then align the paper guides to the paper size by pinching the clip.
If the paper size of the paper guide and the paper do not match, skewing and misfeeds might occur.
Do not stack paper over the limit mark, otherwise a skewed image or misfeeds might occur.
Open out the extender to support paper sizes larger than A4![]() , 81/2"
, 81/2" ![]() 11"
11"![]() .
.
Fan the paper to get air between the sheets to avoid a multi-sheet feed.
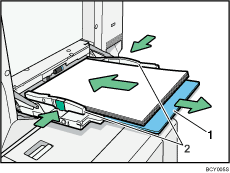
Extender
Paper Guide
![]() Set the paper size using the printer driver or the control panel.
Set the paper size using the printer driver or the control panel.
![]()
When loading thick paper, thin paper, or OHP transparencies, set paper size and paper type.
The number of sheets that can be loaded in the bypass tray depends on the paper type.
When loading letterhead paper, see "Loading Paper", General Settings Guide.
When the Panel Key Sound is turned off, it will not sound if you insert paper into the bypass tray. For details about Panel Key Sound, see "System Settings", General Settings Guide.
For details about setting printer drivers, see the printer driver Help.