


  |  | ||
The following explanation uses the example of installing the envelope feeder unit in "Tray 2".
![]()
Even if the optional envelope feeder is not installed, you can select envelope sizes for Tray 2 using the control panel. However, you cannot load envelopes until the optional envelope feeder unit is installed.
With the optional envelope feeder unit, you can load up to 60 envelopes at the same time.
Confirm that the envelope flaps are securely folded down, and that there is no air inside the envelopes.
Do not slide the paper tray in with force. If you do, the front and side guides might move.
Pull the optional paper feed unit (Tray 2) out until it stops. Then, lift it slightly, and then slide it out.
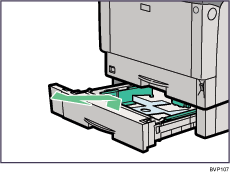
Prepare the envelope feeder unit.
Pinch the side guides, and then slide them outward until they stop. Pinch the rear guide, and then slide it toward the back.
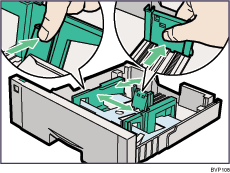
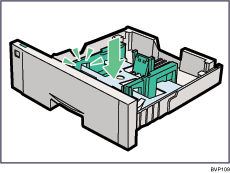
Push the bottom plate down until it locks into place.
Load envelopes into the envelope feeder unit, with the print side down and the flap on the left as shown in the illustration.
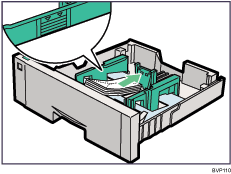
Pinch the side guides, and then slide them along the edges of the envelope stack.
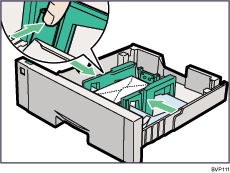
Pinch the rear guide, and then slide it along the edge of the envelope stack.
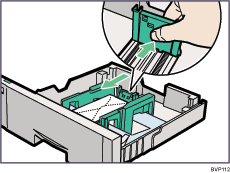
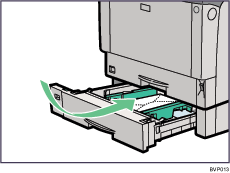
Lift the front end of the tray, and then carefully slide the tray into the printer until it stops.
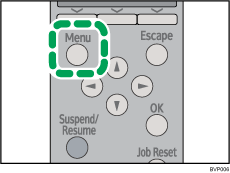
Press the [Menu] key.
Press the [![]() ] or [
] or [![]() ] key to select [Paper Input], and then press the [OK] key.
] key to select [Paper Input], and then press the [OK] key.

Press the [![]() ] or [
] or [![]() ] key to select [Paper Size: Tray 2], and then press the [OK] key.
] key to select [Paper Size: Tray 2], and then press the [OK] key.

Select the envelope type using the scroll keys, and then press the [OK] key.

Press the [Menu] key.
The display returns to the initial screen.
![]()
Confirm that the top of the stack is not higher than the limit mark on the side guides.
Confirm that the envelopes fit under the side guides.
Do not push the stack of envelopes with too much force.
Keep the removed paper tray with paper in a cool and dry place.