Replacing the Friction Pad
Replace all the friction pads in the trays. The following procedure shows how to replace the tray's friction pad (Tray 1). Use the remaining pads to replace the old pads in the paper feed unit (Tray 2 and 3).
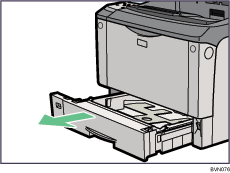
![]() Pull out the paper tray until it stops.
Pull out the paper tray until it stops.
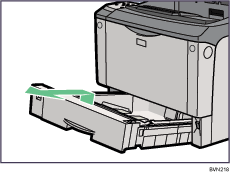
![]() Lift the front side of the tray, and then pull it out of the printer.
Lift the front side of the tray, and then pull it out of the printer.
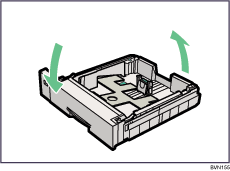
![]() Remove paper from the paper tray. Place the tray upside down on a flat surface.
Remove paper from the paper tray. Place the tray upside down on a flat surface.
![]() Use a sharp-pointed item like a ball-point pen, to release the two catches that lock the friction pad.
Use a sharp-pointed item like a ball-point pen, to release the two catches that lock the friction pad.
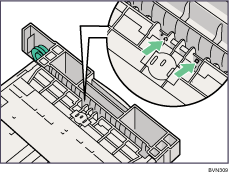
The friction pad may fall off when the catches are released. Place your hand over the friction pad while releasing the catches.
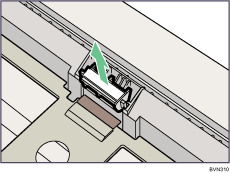
![]() Return the paper tray to its original position, and then remove the friction pad from the tray.
Return the paper tray to its original position, and then remove the friction pad from the tray.
![]() Insert the new friction pad in the paper tray.
Insert the new friction pad in the paper tray.
Attach the central projection of the new friction pad to the spring, and then align the projection of both sides of the friction pad with the holes of the paper tray. Then push the friction pad as shown in the illustration until it clicks.
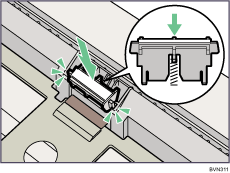
After pushing in the friction pad, press on it several times to check it is properly installed. If it jumps back into position due to the force of the spring, it is properly installed.
![]() Push the friction pad until it locks securely.
Push the friction pad until it locks securely.
![]() Repeat the replacement procedure for any optional paper feed units that are installed.
Repeat the replacement procedure for any optional paper feed units that are installed.
![]()
The friction pad spring may come off. Be careful not to lose the friction pad spring.
The catches that lock the friction pad are located at the very back.

