Specifying a paper type for the Bypass Tray
You can improve the printer's performance by specifying the type of paper that you are placing on the Bypass Tray. You can select one of the following paper types:
No Display (Plain Paper), Recycled Paper, Special Paper 1, Special Paper 2, Special Paper 3, Colour Paper, Letterhead, Label Paper, OHP (Transparency), Envelope, Preprinted Paper, Bond Paper, Cardstock, Thick Paper 1, Thick Paper 2
You can select custom paper type settings made using Web Image Monitor.
![]()
Be sure to select the paper type when you load thick paper, envelopes, or OHP transparencies in the Bypass Tray.
The paper type selected using the printer driver overrides that selected using the control panel.
Be sure to set a paper type using the control panel of the printer as the following procedure. If you set a paper type only by the printer driver, printing result might not be appropriate.
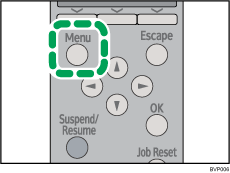
![]() Press the [Menu] key.
Press the [Menu] key.

![]() Press the [
Press the [![]() ] or [
] or [![]() ] key to select [Paper Input], and then press the [OK] key.
] key to select [Paper Input], and then press the [OK] key.

![]() Press the [
Press the [![]() ] or [
] or [![]() ] key to select [Paper Type: Bypass Tray], and then press the [OK] key.
] key to select [Paper Type: Bypass Tray], and then press the [OK] key.

![]() Press the [
Press the [![]() ] or [
] or [![]() ] key to select the paper type that is loaded, and then press the [OK] key.
] key to select the paper type that is loaded, and then press the [OK] key.

About two seconds later, the display returns to the [Paper Input] screen.
![]() Press the [Menu] key.
Press the [Menu] key.
The display returns to the initial screen.
![]()
The following paper types cannot be printed on both sides:
Special Paper 1, Special Paper 2, Special Paper 3, Colour Paper, OHP (Transparency), Envelope, Preprinted Paper, Thick Paper 1, Thick Paper 2

