Storing Data
Following describes the procedure for storing documents on the Document Server.
![]()
Data stored in the machine might be lost if some kind of failure occurs. The manufacturer shall not be responsible for any damage resulting from loss of data.
Be careful not to let anyone know your password, especially when entering a password or recording it. Keep any record of your password in a secure place.
Avoid using a single number or consecutive numbers for a password such as “0000” or “1234”, since the numbers like this are easy to guess, so using them will not provide a worthwhile level of security.
A document accessed with a correct password remains selected even after operations are complete, and it can be accessed by other users. After the operation, be sure to press the [Clear Modes] key to cancel the document selection.
The user name registered to a stored document in the Document Server is to identify the document creator and type. It is not to protect confidential documents from others.
When scanning by the scanner, make sure that all other operations are ended.
File Name
A document name such as “COPY0001” and “COPY0002” is automatically attached to the scanned document. You can change the document name.
User Name
You can register a user name to identify the user or user group that stored the documents. To assign it, select the user name registered in the Address Book, or enter the name directly.
Password
To prevent unauthorized printing, you can set a password for any stored document. A protected document can only be accessed if its password is entered. If a password is set for the documents, the key icon appears next to the documents.
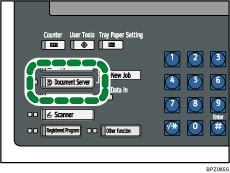
![]() Press the [Document Server] key.
Press the [Document Server] key.

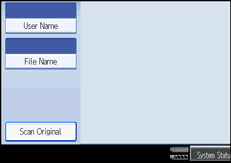
![]() Press [Scan Original].
Press [Scan Original].

![]() Enter a user name, file name, and password, if necessary.
Enter a user name, file name, and password, if necessary.
When not changing a file name, the name will be automatically set.
![]() Set the original.
Set the original.
![]() Specify the original scanning conditions.
Specify the original scanning conditions.
![]() Press the [Start] key.
Press the [Start] key.
The original is scanned. The document is saved in the Document Server.
![]()
Enter the password in the range of four and eight digits.
To stop scanning, press the [Stop] key. To restart a paused scanning job, press [Continue] in the confirmation display. To delete saved images and cancel the job, press [Stop]. The original placed in the ADF will be ejected.
If a password is set, the key icon appears on the left side of the file name.
After scanning, a list of stored documents will be displayed. If the list does not appear, press [Finish Scanning].
Data stored in the Document Server is set to be deleted after three days (72 hours) by the factory default. You can specify the period after which the stored data is deleted automatically under Auto Delete File in Document Server in User Tools. See “System Settings”, Network and System Settings Guide
 .
.If you do not want stored documents to be automatically deleted, select [Off] in Auto Delete File in Document Server before storing a document. If you select [On] later, data stored after will be automatically deleted.
When storing another document in the Document Server after storing a document from the copy feature, be sure that its copy is completed.
Depending on the security setting, [Access Privileges] may appear instead of [User Name]. For details about specifying [Access Privileges], consult the administrator.
For details about how to enter text, see “Entering Text”, About This Machine

 .
.

